
Knowledge Base / Frequently Asked Questions / Device ManageR (Legacy)
Device ManageR can log sensor and alert data to external databases, including MySQL, PostgreSQL and SQL Server. Follow the steps below to configure SQL Server for use with Device ManageR.
Device ManageR supports SQL Server versions 2008 and later.
Follow the steps below to install MS SQL Server (version 2008 or later).
1. Download and run the MS SQL Server Installer.
2. In the SQL Server Installation Center window, select Installation in the navigation bar to the left; then select New SQL Server stand-alone installation or add features to an existing installation.

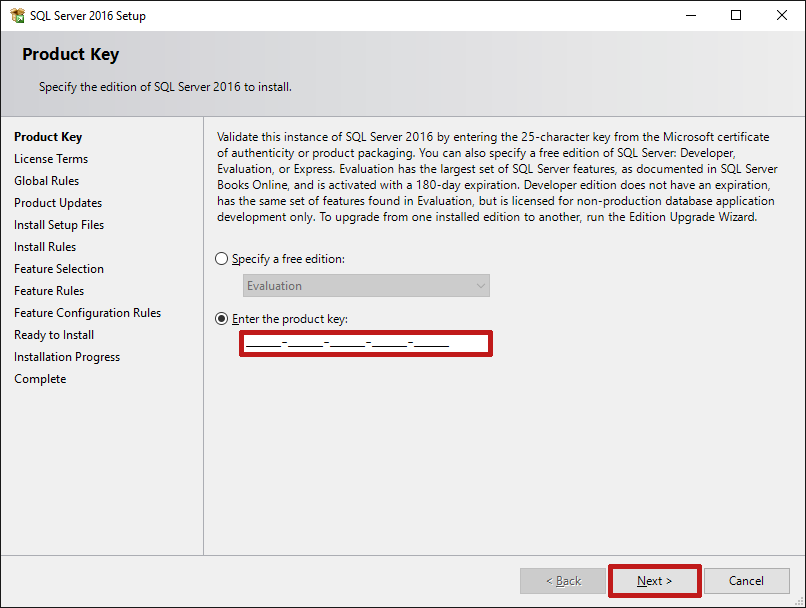
3. When the SQL Server Setup window appears, enter your product key on the Product Key page. Then select Next.
4. In the License Terms window, accept the license terms and then select Next.
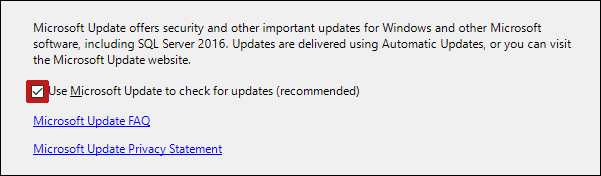
5. In the Microsoft Update window, if you wish to have SQL Server updated automatically, select Use Microsoft Update to check for updates. Otherwise, leave the box blank. Then select Next.
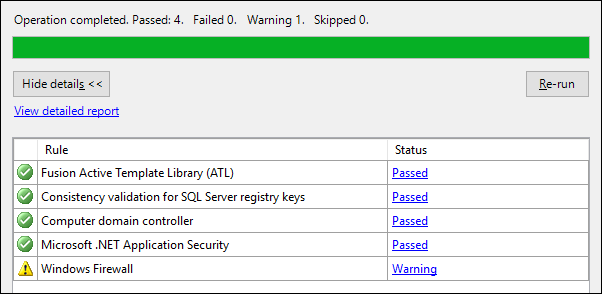
6. In the Install Rules window, correct any rules with a Failed status and note any Warnings. Then select Next.
7. In the Feature Selection window, select Database Engine Services. (You may leave Instance root directory at the default.) Then select Next.

8. In the Instance Configuration window, you may leave Default Instance selected, unless you wish to name this SQL Server instance something other than MSSQLSERVER. Then select Next.

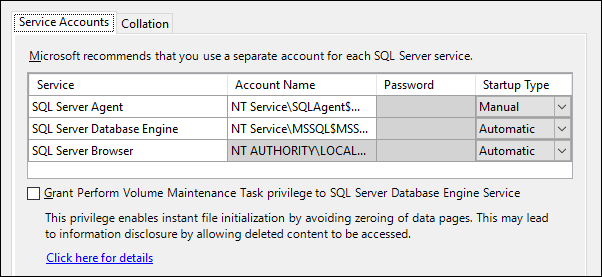
9. Leave the defaults in the Server Configuration window, and select Next.
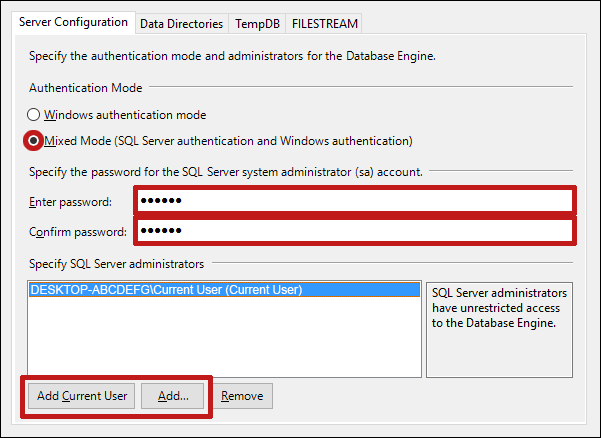
10. When the Database Engine Configuration window opens, follow these steps in the Server Configuration tab:
a. In Authentication Mode, select Mixed Mode. Enter and confirm a password for the system administrator (“sa”) account.
b. In Specify SQL Server administrators, select either Add Current User or Add if you wish to add a different user.
c. Then select Next.
11. In the Ready to Install window, select Install.
12. When the Complete window appears, select Close.
Follow the steps below to set up your database with MS SQL Server Management Studio:
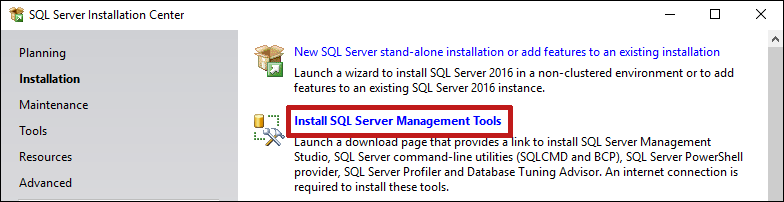
1. Return to the SQL Installation Center window and select Install SQL Server Management Tools.
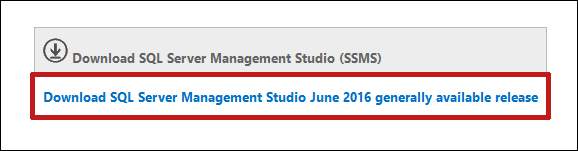
2. Your browser will launch and take you to the Download SQL Server Management Studio web page. Select the Download SQL Server Management Studio link.
3. When the Microsoft SQL Server Management Studio welcome page appears, select Install.
4. Wait for the installation to complete, and then select Close to close the window.
5. Open Management Studio in Windows by navigating to Start→All Programs/All Apps→Microsoft SQL Server→Microsoft SQL Server Management Studio.
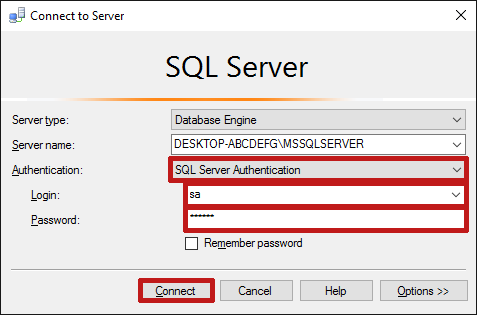
6. Management Studio will launch. When the Connect to Server dialog box appears:
a. Select SQL Server Authentication in the Authentication drop-down menu.
b. Enter “sa” (meaning system administrator) in Login.
c. Enter the password you created earlier in the process in Password.
d. Select Connect.
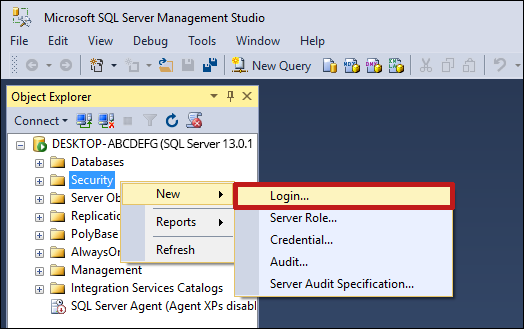
7. In the Object Explorer bar to the left, right-click on Security; select New; then select Login.
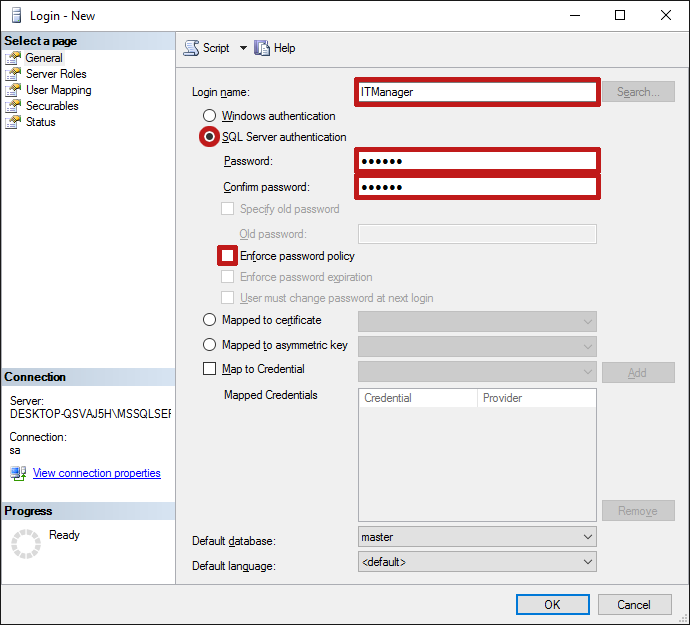
8. In the Login – New window:
a. Enter a new login name. In our example, we are using “ITManager.”
b. Select SQL Server authentication, and then enter and confirm a password for this user.
c. UNcheck Enforce password policy—the box should be blank.
d. Select the Server Roles tab in the navigation bar to the left, and choose the permissions you wish to grant to the user. The minimum permissions Device ManageR requires are public, which cannot be unchecked, and sysadmin.
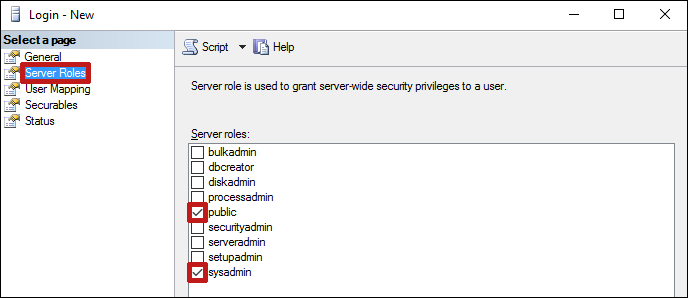
e. Then select OK at the bottom of the screen.
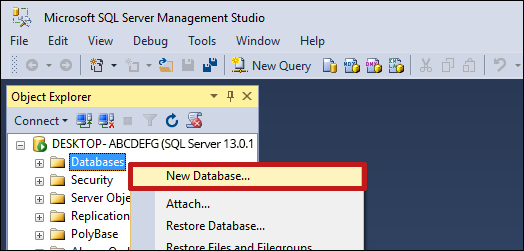
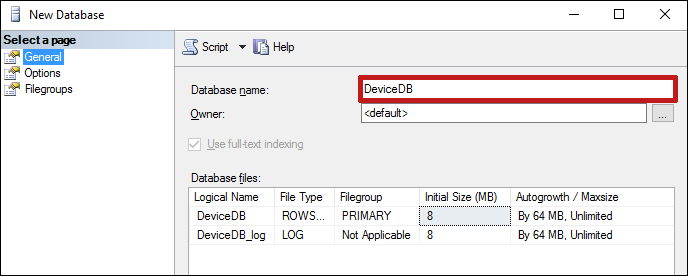
9. In the Object Explorer bar to the left, right-click on Databases, and select New Database from the menu that appears.
10. In the New Database window, enter a name for the database Device ManageR will use. (We’re calling ours “DeviceDB” in our example.) Then select OK at the bottom of the screen.
Follow the steps below to configure TCP/IP with SQL Server Configuration Manager:
1. Open the SQL Server Configuration Manager in Windows. You may open it by navigating in Windows to Start→All Programs/All Apps→Microsoft SQL Server→SQL Server Configuration Manager.
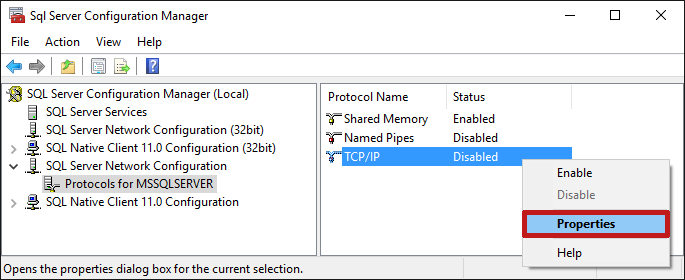
2. In the navigation pane to the left, select SQL Server Network Configuration.
3. Then select Protocols for <your MS SQL Server name>.
4. In the pane on the right, right-click on TCP/IP and select Properties from the menu that appears.
5. In the TC/IP Properties window, select the Protocol tab.
a. In Enabled, select Yes from the drop-down menu.
b. Select Apply.
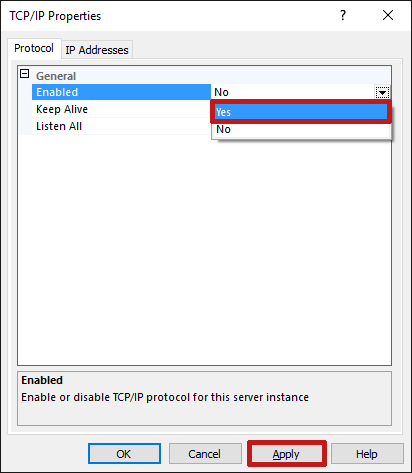
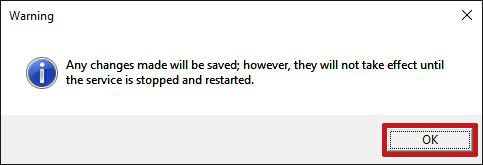
c. Select OK when the warning dialog box appears.
6. Select the IP Addresses tab in the TCP/IP Properties window.
a. Enter “1433” in the TCP Port field for every IP section listed.
b. Select Apply.
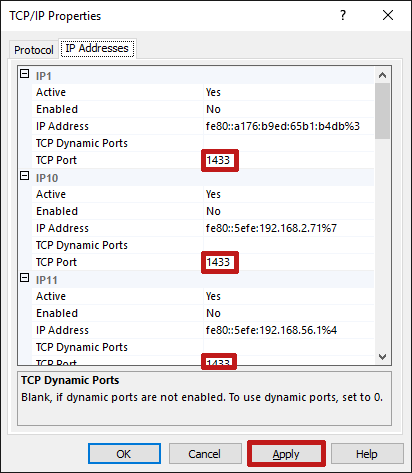
c. The warning dialog box will appear again. Select OK.
7. Select OK in the TCP/IP Properties window to close it.
8. Restart your SQL Server service by following these steps:
a. In navigation pane to the left in the Configuration Manager window, select SQL Server Services.
b. In the pane to the right, right-click on SQL Server.
c. Select Restart from the menu that appears.
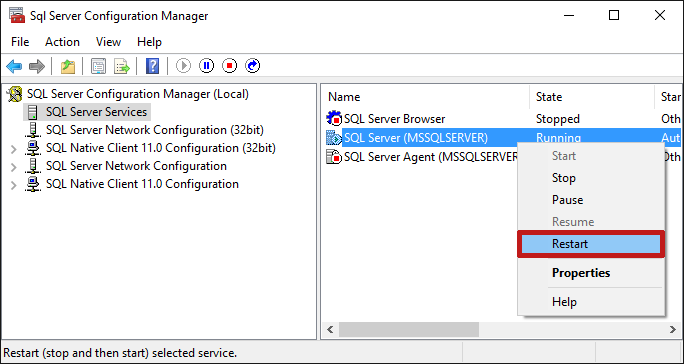
d. The service will restart, committing the changes you made above.
Follow the steps below to set up Device ManageR:
1. Open Device ManageR in your web browser. You may open it by entering ‘localhost:8080’ or ‘<IP address of host system>:8080’ in your browser’s address bar.
2. Select Settings in the navigation bar to the left.
3. In the Settings menu, select Advanced.
4. In Database Settings, follow these steps:
a. In Database Type, select SQL Server.
b. If Device ManageR and your SQL Server are installed on the same computer, leave “localhost” in Host Name or IP Address, as we have in our example. Otherwise, enter your SQL Server’s hostname or IP address.
c. In Database Name, enter the name you gave your SQL Server database. In our example, our database name is “DeviceDB.”
d. In Database Port, enter your SQL Server database port. The default SQL Server port is 1433, which is what we retained in our example.
e. In Database Username, enter the username you created for your SQL Server. In our example, our username is “ITManager.”
f. In Database Password, enter the password you gave to that username.
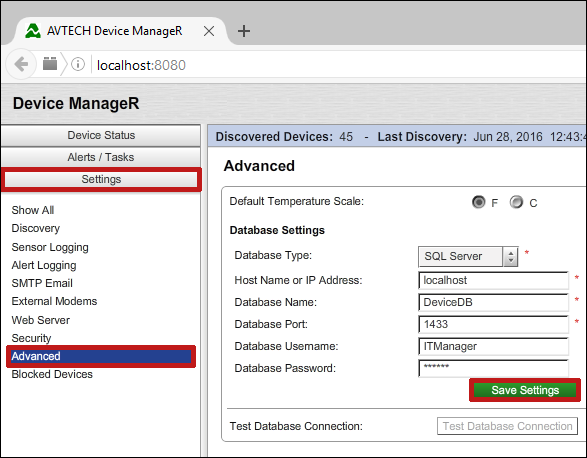
5. Select Save Settings.
6. The Export Logged Database Data dialog box will appear, asking if you’d like to export your currently-logged data to your new SQL Server database.
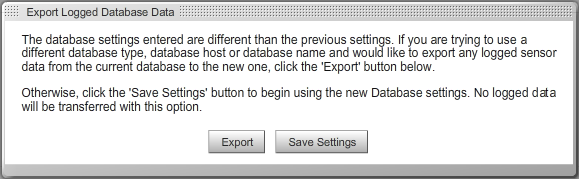
a. If you do want to export your existing data, select Export.
– When the confirmation message appears, select OK.
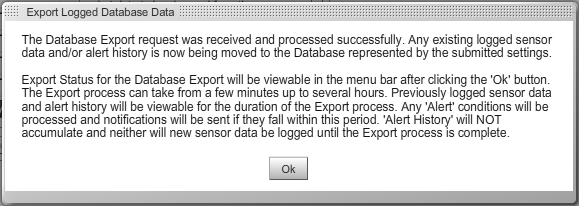
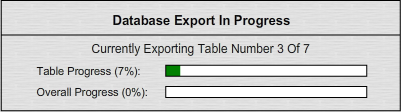
– You’ll see progress bars at the top of the Device ManageR window showing the progress of the export. Depending on the size of your existing database, the export can take from a few minutes to up to several hours.
b. If you don’t want to export your existing data, select Save Settings. You’ll start fresh with an empty SQL Server database.
Note that you can test Device ManageR’s connection to your SQL Server database any time (after you save your settings) by selecting Test Database Connection.
We'd love to talk with you about your monitoring needs. Contact one of our Product Specialists for a free consultation.


You may find Windows Command Prompt at the following path:
To run Windows Command Prompt as an administrator:

If you are using this client, you should configure the general SNMPv3 Credentials, but leave the Read / Write SNMPv3 Credentials section blank.
| Current S models | Current E models |
|---|---|
| Room Alert 32S | Room Alert 32E |
| Room Alert 12S | Room Alert 12E |
| Room Alert 4E | |
| Room Alert 3E | |
| Current S models | Current E models |
|---|---|
| Room Alert 32S | Room Alert 32E |
| Room Alert 12S | Room Alert 12E |
| Room Alert 3S | Room Alert 4E |
| Room Alert 3E | |
| Room Alert 3W |
