Knowledge Base / Frequently Asked Questions / Device ManageR (Legacy)
You may view a video demonstration of setting up email in Device ManageR below:
The most common type of alert notification to use in Device ManageR is an email (or email-to-SMS) message. In order to send email from Device ManageR, you must first configure your mail server.
To set up your mail server in Device ManageR, please follow these steps:
Do not enclose email or email-to-SMS addresses in angle brackets (<>).
1. Open Device ManageR in your web browser. You may open it by entering ‘localhost:8080’ or ‘<IP address of host system>:8080’ in your browser’s address bar.
2. Select Settings in the navigation bar to the left.
3. Then select SMTP Email from the Settings menu.
4. Under Primary Mail Server, enter the following:
-In Mail Server IP or DNS Name, enter your mail server’s domain name or IP address.
-In Port Number, you may leave the default, 25, a commonly-used port, or enter the port that your mail server uses.
-Typically, you may leave SMTP Timeout at the default, 15 seconds.
-If your mail server uses SSL or TLS encryption, check the appropriate box: Use SSL or Use TLS. Otherwise, leave those boxes blank.
-In From (Return) Mail Address, enter the email address you want alert notifications to come from.
-If your mail server requires login credentials, enter the Username and Password for the From (Return) address. Otherwise, leave those fields blank.
-If you wish, you may enter an address in Test Recipient Email. This address will receive a test email if you choose to send one later in the process.
5. Then select Save Settings.
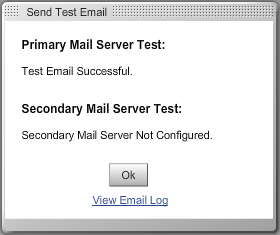
6. Once you’ve saved your mail server information, you may wish to select Send Test Email to make sure you configured your settings correctly. Your Test Email Recipient will receive the test email.

You may configure a backup mail server if you wish. Device ManageR will only use this backup if an email attempt with the primary mail server fails, as it would if that mail server is temporarily unavailable or unexpectedly down.
Follow the same steps as above to configure your secondary mail server, including sending a test email to make sure it is configured correctly.
If you need to do any troubleshooting for email in Device ManageR, you may find the email log helpful. The email log shows the history of communication between Device ManageR and your mail server, including the contents of the emails themselves.
To view it, select View Email Log, which will download a file called ‘Email.log’ to your computer.
After you’ve set up and successfully tested your mail server, the next step is to enter the contact(s) that your notifications will go to. For more information, please see the next FAQ, How to Create and Edit Contacts in Device ManageR.

You may find Windows Command Prompt at the following path:
To run Windows Command Prompt as an administrator:
| Current S models | Current E models |
|---|---|
| Room Alert 32S | Room Alert 32E |
| Room Alert 12S | Room Alert 12E |
| Room Alert 3S | Room Alert 4E |
| Room Alert 3E | |
| S models | E & W models |
|---|---|
| Room Alert 32S | Room Alert 32E |
| Room Alert 12S | Room Alert 12E |
| Room Alert 3S | Room Alert 4E |
| Room Alert 3E | |
| Room Alert 3W |
| Model |
|---|
| Room Alert MAX |
| Room Alert 32S |
| Room Alert 12S |
| Room Alert 3S |
| Room Alert 32E/W |
| Room Alert 12E |
| Room Alert 4E |
| Room Alert 3E |
| Room Alert 3 Wi-Fi |