
Knowledge Base / Frequently Asked Questions / Device ManageR (Legacy)
By default, Device ManageR runs on HTTP port 8080, making it accessible via web browser at localhost:8080 or <IP address of host system>:8080.
If you’d like to change the HTTP port for Device ManageR, follow these steps:
1. Open Device ManageR in your web browser. You may open it by entering ‘localhost:8080’ or ‘<IP address of host system>:8080’ in your browser’s address bar.
2. Select Settings in the navigation bar to the left.
3. In the Settings menu, select Web Server.
4. In Port for Web Access, enter a port number between 1024 and 65535.*
5. Select Save.
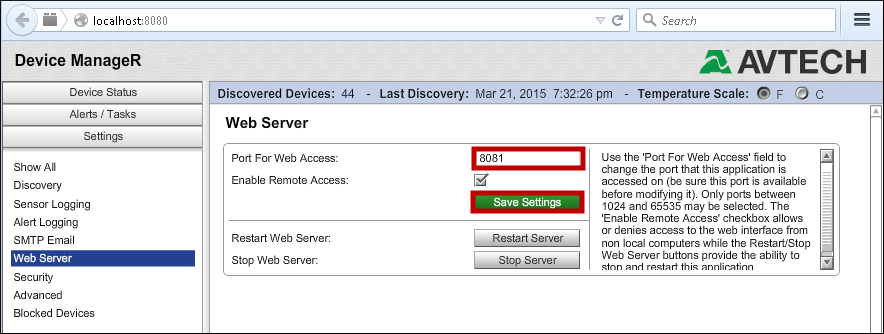
6. You’ll see the message, “The HTTP port for web access has been changed. Redirecting to new port in 10 seconds.”
7. Device ManageR will re-open at the new port in your web browser. In this example, Device ManageR re-opens at localhost:8081.
We recommend that you change the HTTP port using the web interface; however, if you know that Device ManageR’s default port, 8080, is already being used by another service on its host system, you’ll be unable to open it. In this case, you may change Device ManageR’s port by modifying one of its program files.
These instructions require you to start and stop the Device ManageR service. This FAQ shows you how: How To Stop, Start And Restart The Device ManageR Service.
1. Stop the Device ManageR service.
2. Navigate to Device ManageR’s installation folder on its host system (C:\Program Files\AVTECH Device ManageR or C:\Program Files (x86)\AVTECH Device ManageR by default).
3. Locate the “conf” folder and open it.
4. In the “conf” folder, locate the “settings.xml” file.
5. Open that file in any text editor, such as Notepad or Notepad++.
6. Find the line that reads “<http_port>8080</http_port>.”
7. Change “8080” to the port you want to use.
8. Save the “settings.xml” file.
9. Close Device ManageR’s installation folder.
10. Start the Device ManageR service.
11. Open Device ManageR in your web browser at the port you just configured.
We'd love to talk with you about your monitoring needs. Contact one of our Product Specialists for a free consultation.


You may find Windows Command Prompt at the following path:
To run Windows Command Prompt as an administrator:

If you are using this client, you should configure the general SNMPv3 Credentials, but leave the Read / Write SNMPv3 Credentials section blank.
| Current S models | Current E models |
|---|---|
| Room Alert 32S | Room Alert 32E |
| Room Alert 12S | Room Alert 12E |
| Room Alert 3S | Room Alert 4E |
| Room Alert 3E | |
| S models | E & W models |
|---|---|
| Room Alert 32S | Room Alert 32E |
| Room Alert 12S | Room Alert 12E |
| Room Alert 3S | Room Alert 4E |
| Room Alert 3E | |
| Room Alert 3W |
| Model |
|---|
| Room Alert MAX |
| Room Alert 32S |
| Room Alert 12S |
| Room Alert 3S |
| Room Alert 32E/W |
| Room Alert 12E |
| Room Alert 4E |
| Room Alert 3E |
| Room Alert 3 Wi-Fi |
