
Knowledge Base / Frequently Asked Questions / Device ManageR (Legacy)
The database used by Device ManageR continuously increases in size as it logs sensor and alert data. Deleting old logged data allows database operations in Device ManageR to run most efficiently. If you do not need to keep all of your logged data, you can trim it manually or use the Delete Database Data action to trim it automatically. Deleting unneeded data allows the queries that generate graphs and export data to CSV files to execute much more quickly.
You may view a video demonstration below:
If you have a large database, we suggest that you manually delete unneeded data before using the Delete Database Data action.
Manually Deleting Database Data
Automatically Deleting Database Data
To manually delete logged sensor data, follow these steps:
1. Open Device ManageR in your web browser. You may open it by entering ‘localhost:8080’ or ‘<IP address of host system>:8080’ in your browser’s address bar.
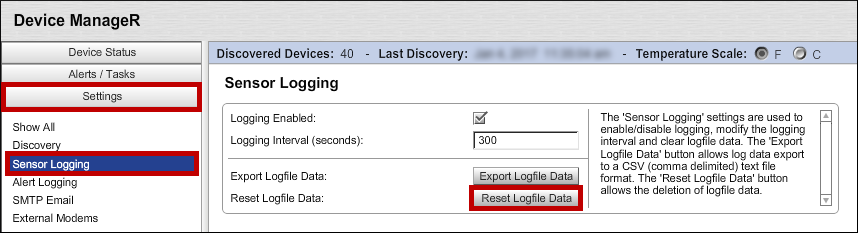
2. Select Settings in the navigation bar to the left.
3. In the Settings menu, select Sensor Logging.
4. Select Reset Logfile Data to open the Reset Logfile Data window.
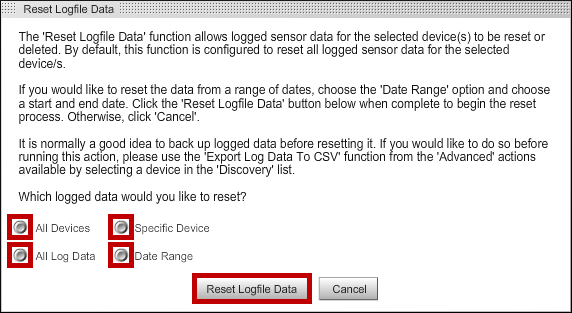
5. In the Reset Logfile Data window, you’ll see the prompt ‘Which logged data would you like to reset?’ and a set of choices:
– You may leave the default of All Devices and All Log Data if you wish, which will completely erase your database.
– Or you may choose to delete data only for a Specific Device and/or Date Range by selecting those radio buttons.
6. Once you have made your choices, select Reset Logfile Data to initiate the delete.
– The time is takes for the system to reset the specified data depends on the current size of your database. Please note that you will not be able to access sensor data while the data reset in in progress. Please do not stop the Device ManageR service while the reset is in progress.
7. You can tell that the data reset process is finished by comparing the size of your database before and after the process.
– The database will be smaller after the process has completed. (The size will not decrease while the reset is in progress, only after it has completed.)
– To view the size of Device ManageR’s built-in database, go to the Device ManageR installation directory (C:\Program Files\AVTECH Device ManageR or C:\Program Files (x86)\AVTECH Device ManageR by default) and locate the ‘DeviceDB’ folder. Within that folder, view the size of the DeviceDB.h2.db file.
The Delete Database Data action can take a fair amount of time to execute, especially the first time your run it. We recommend configuring the Delete Database Action as a Scheduled Task to run on weekends overnight.
To set up a database delete Scheduled Task:
– First, create your Action.
– Next, create your Schedule.
– Finally, create your Scheduled Task.
1. Open Device ManageR in your web browser. You may open it by entering ‘localhost:8080’ or ‘<IP address of host system>:8080’ in your browser’s address bar.
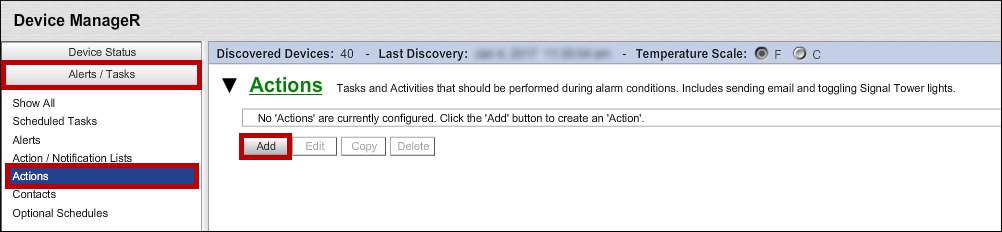
2. Select Alerts / Tasks in the navigation bar to the left.
3. In the Alerts / Tasks menu, select Actions.
4. Select Add.
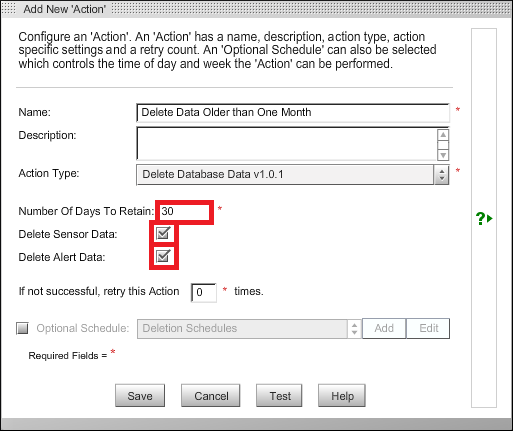
5. In the Add New Action window:
– In the Name field, enter a name for your action. We’ll call our example, ‘Delete Data Older than One Month.’
– In the Action Type drop down menu, select Delete Database Data.
– In the Number Of Days To Retain field, enter the number of days of data you want to keep. Every time this Action is executed, it will delete any data that is older than that number. We’ll use ’30’ for this example to keep about a month’s worth of data at all times.
– You may choose Delete Sensor Data, Delete Alert Data, or both, by selecting the buttons next to those options.
We suggest deleting logged sensor data as it is typically large and may impact your database performance.
Because logged alert data is typically not large, you may, if you wish, leave the button unchecked to keep track of all instances of Alerts going into alarm state.
For our example, we selected both options to delete the most data possible from the database.
6. Then select Save to save your action.
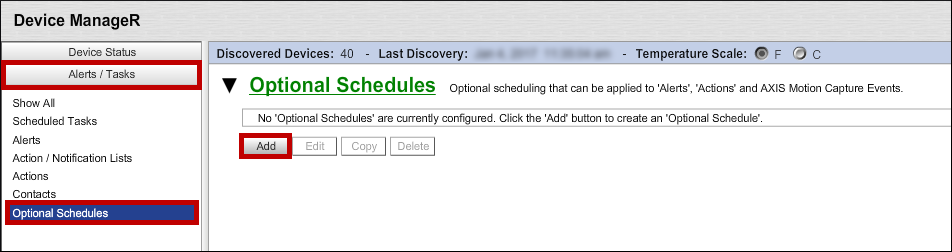
1. In the Alerts / Tasks menu, select Optional Schedules.
2. Select Add to open the Add New ‘Optional Schedule’ window.
3. In the Add New ‘Optional Schedule’ window, configure and save your schedule. (For instructions on configuring Optional Schedules, please see this FAQ: How To Configure Schedules In Device ManageR.)
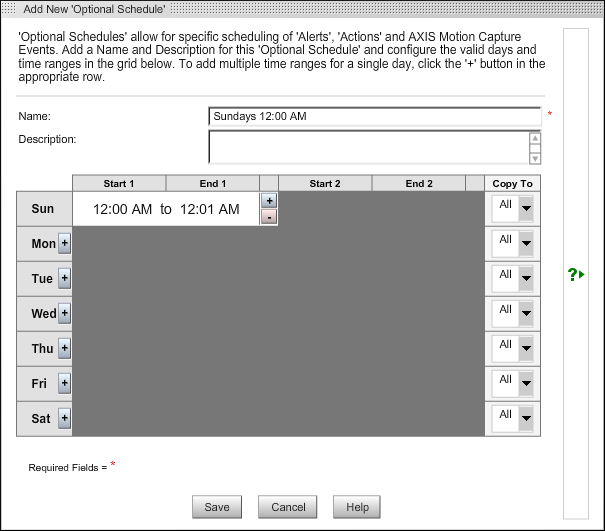
– In this example, we’ve configured our schedule to run at 12:00 AM Sunday morning, as this should be a low-use time for Device ManageR.
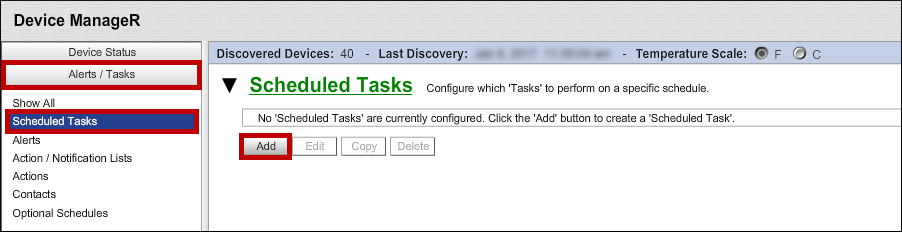
1. In the Alerts / Tasks menu, select Scheduled Tasks.
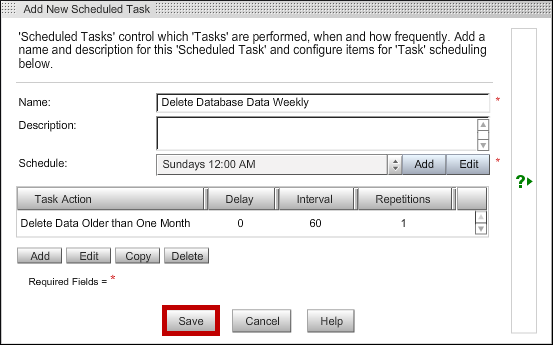
2. Select Add to open the Add New Scheduled Task window.
3. In the Add New Scheduled Task window, name your task. For this example, we used ‘Delete Database Data Weekly.’
4. In Description, you may, if you wish, include any notes you feel would be helpful.
5. In Schedule, choose the schedule you just created.
6. Then select Add at the bottom of the screen to add a Scheduled Task Item.

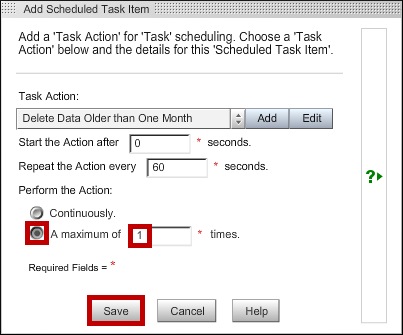
7. In the Add Scheduled Task Item window, choose the action you just created from the Task Action drop down menu.
8. Next set this action to only execute once by selecting A maximum of 1 time.
9. Then, select Save to save your Scheduled Task Item.
10. You will return to the Add New Scheduled Task window. Select Save to save your Scheduled Task.
Once you’ve saved your Scheduled Task, your Device ManageR installation is configured to reset data from its database on a weekly basis. This should keep your sensor graphs and dashboard data loading quickly, and improve overall performance with the application.
We'd love to talk with you about your monitoring needs. Contact one of our Product Specialists for a free consultation.


You may find Windows Command Prompt at the following path:
To run Windows Command Prompt as an administrator:

If you are using this client, you should configure the general SNMPv3 Credentials, but leave the Read / Write SNMPv3 Credentials section blank.
| Current S models | Current E models |
|---|---|
| Room Alert 32S | Room Alert 32E |
| Room Alert 12S | Room Alert 12E |
| Room Alert 3S | Room Alert 4E |
| Room Alert 3E | |
| S models | E & W models |
|---|---|
| Room Alert 32S | Room Alert 32E |
| Room Alert 12S | Room Alert 12E |
| Room Alert 3S | Room Alert 4E |
| Room Alert 3E | |
| Room Alert 3W |
| Model |
|---|
| Room Alert MAX |
| Room Alert 32S |
| Room Alert 12S |
| Room Alert 3S |
| Room Alert 32E/W |
| Room Alert 12E |
| Room Alert 4E |
| Room Alert 3E |
| Room Alert 3 Wi-Fi |
