
Knowledge Base / Frequently Asked Questions / Device ManageR (Legacy)
This FAQ shows you the steps for creating alerts in Device ManageR from the very beginning, where you set up your mail server, to the end, where you set up the Alert itself.
You may view a video demonstration of setting up alerts below:
The most common type of alert notification to use in Device ManageR is an email (or email-to-SMS) message. In order to send email from Device ManageR, you must first configure your mail server.
To set up your mail server in Device ManageR, please follow these steps:
1. Open Device ManageR in your web browser. You may open it by entering ‘localhost:8080’ or ‘<IP address of host system>:8080’ in your browser’s address bar.
2. Select Settings in the navigation bar to the left.
3. Then select SMTP Email from the Settings menu.
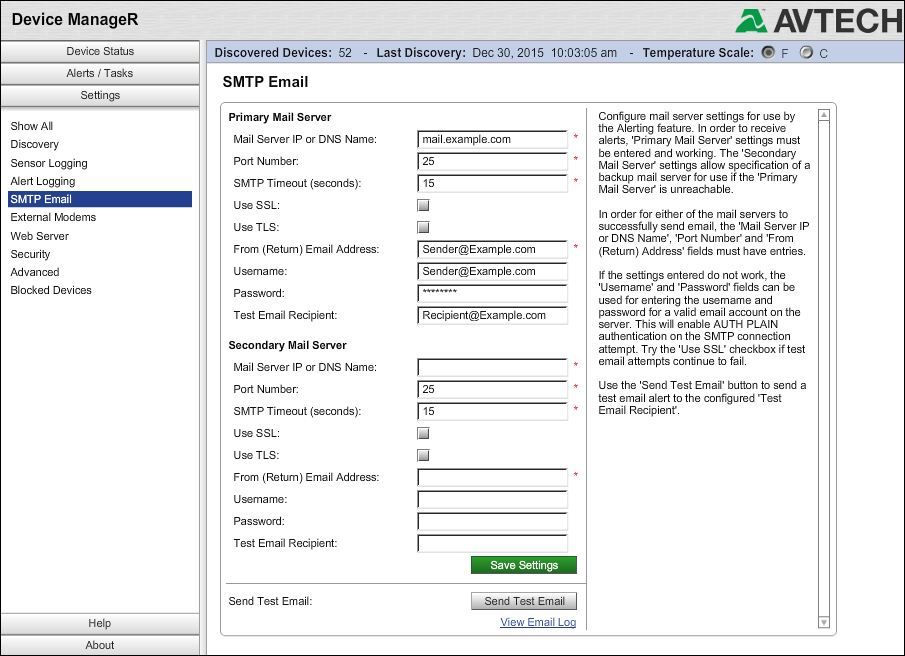
4. Under Primary Mail Server, enter the following:
Do not enclose email or email-to-SMS addresses in angle brackets (<>).
-In Mail Server IP or DNS Name, enter your mail server’s domain name or IP address.
-In Port Number, you may leave the default, 25, a commonly-used port, or enter the port that your mail server uses.
-Typically, you may leave SMTP Timeout at the default, 15 seconds.
-If your mail server uses SSL or TLS encryption, check the appropriate box: Use SSL or Use TLS. Otherwise, leave those boxes blank.
-In From (Return) Mail Address, enter the email address you want alert notifications to come from.
-If your mail server requires login credentials, enter the Username and Password for the From (Return) address. Otherwise, leave those fields blank.
-If you wish, you may enter an address in Test Recipient Email. This address will receive a test email if you choose to send one later in the process.
5. Then select Save Settings.
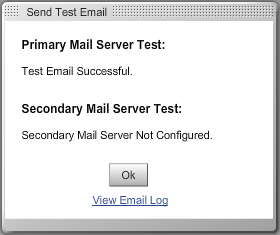
6. Once you’ve saved your mail server information, you may wish to select Send Test Email to make sure you configured your settings correctly. Your Test Email Recipient will receive the test email.
After you’ve set up and successfully tested your mail server, the next step is to enter the contact(s) that your notifications will go to.
You may send alerts from AVTECH’s Device ManageR as an email to a contact’s email address or as a text message to their mobile phone’s email-to-SMS address.
To add a contact to Device ManageR, please follow these steps:
1. Open Device ManageR in your web browser. You may open it by entering ‘localhost:8080’ or ‘<IP address of host system>:8080’ in your browser’s address bar.
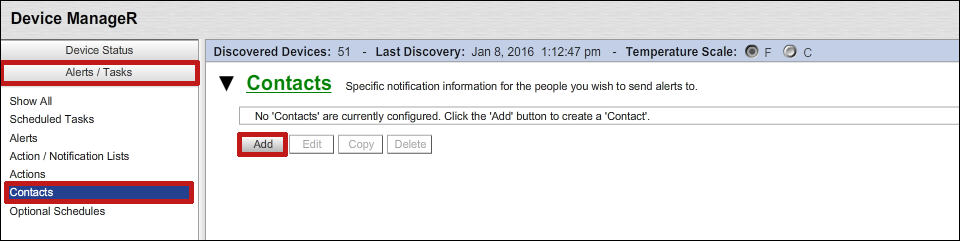
2. Select Alerts / Tasks in the navigation bar to the left.
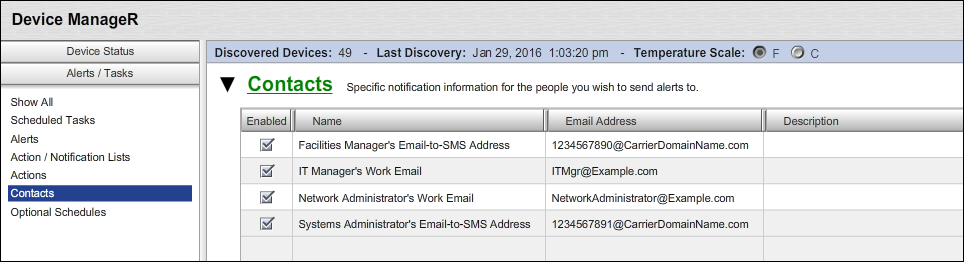
3. In the Alerts / Tasks menu, select Contacts.
4. Then select Add to add your first contact.
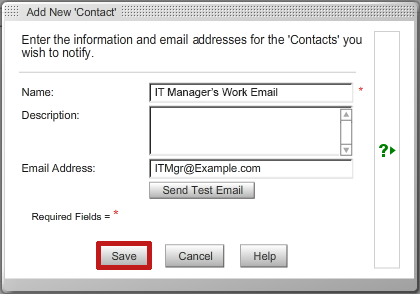
5. In the Add New Contact window, enter the following information:
Do not enclose email or email-to-SMS addresses in angle brackets (<>).
– In Name, enter a name for this contact record. You may wish to be specific in order make this name easy to distinguish in drop-down lists. In our example, we’ve named our contact ‘IT Manager’s Work Email’ instead of simply ‘IT Manager’ or ‘IT Manager’s Email.’
– (Optional) In Description, you may enter any notes you feel would be helpful.
– In Email Address, enter an email or email-to-SMS address. Please note that you may enter only 1 address in this field.
Email address example: ITMgr@Example.com
Email-to-SMS address example: 1234567890@CarrierDomainName.com
Please see our List Of Email-To-SMS Addresses for a list of known mobile phone carrier domain names if you are not sure what domain name to use.
– Then select Save to save your contact.
You may repeat this process to add as many contacts as you wish. In the example below, we’ve added four separate contacts:
Once you’ve saved a contact, the next step is to associate it with an action, such as a Send Email to Configured Contact action.
You may create actions in Device ManageR by following the same basic workflow each time, plus a few steps that are unique to the type of action you choose. The steps below show you what to do for the default and most commonly-used action type, sending an email.
To set up an action in Device ManageR, please follow these steps:
1. Open Device ManageR in your web browser. You may open it by entering ‘localhost:8080’ or ‘<IP address of Device ManageR’s host system>:8080’ in your browser’s address bar.
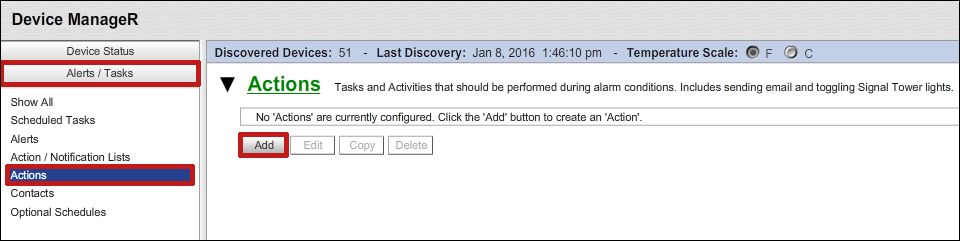
2. Select Alerts / Tasks in the navigation bar to the left.
3. In the Alerts / Tasks menu, select Actions.
4. Select Add to add your first action.
5. In the Add New Action window:
– In Name, enter a name for the action. In our example, we’ve called the action ‘Send email to IT Mgr.’
– (Optional) In Description, you may enter any notes you feel would be helpful.
– In Action Type, select the action you wish to execute from the drop-down list. Once you select the action type, options unique to that action will appear. In this example, we’ll leave the default action type, Send Email to Configured Contact.
– The unique option for this action is the Contact field. In Contact, select a contact from the drop-down menu or select Add to add a new one.
– In If not successful, retry this Action, you may leave the default, 0, or enter a higher number.
– (Optional) If you wish, you may associate a schedule with this action by selecting Optional Schedule and choosing a schedule from the drop-down list. (If you attach a schedule to the action, it can be performed only during the hours you’ve set up in the Optional Schedule.)
6. Then select Save to save the action.

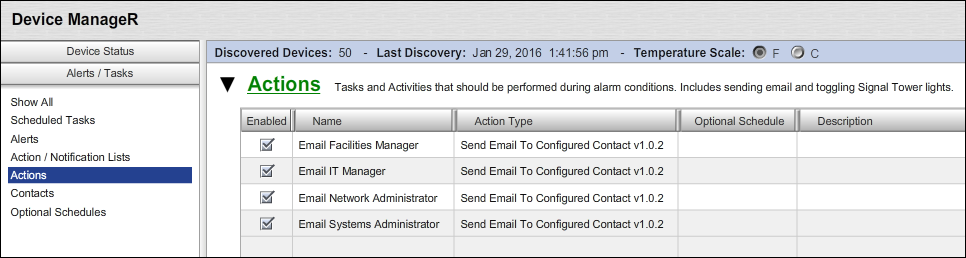
You may repeat this process to add as many actions as you wish. Below, we’ve added a total of four email actions, one for each of our four contacts:
Once you’ve saved an action, the next step is to put it in an Action / Notification List.
Your Action / Notification Lists may include one or many actions. Grouping actions together in an Action / Notification List allows you to execute multiple actions in response to one alert condition. In this example, we’ll group the email actions we made in the previous step in order to notify multiple contacts when an alert occurs.
To create an Action / Notification List in Device ManageR, follow these steps:
1. Open Device ManageR in your web browser. You may open it by entering ‘localhost:8080’ or ‘<IP address of Device ManageR’s host system>:8080’ in your browser’s address bar.
2. Select Alerts / Tasks in the navigation bar to the left.
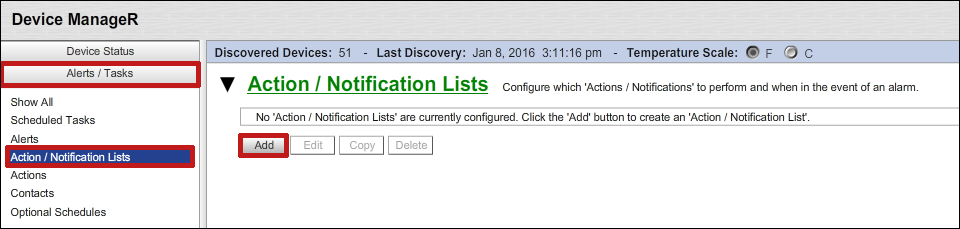
3. In the Alerts / Tasks menu, select Action / Notification Lists.
4. Select Add to add your first Action / Notification List.
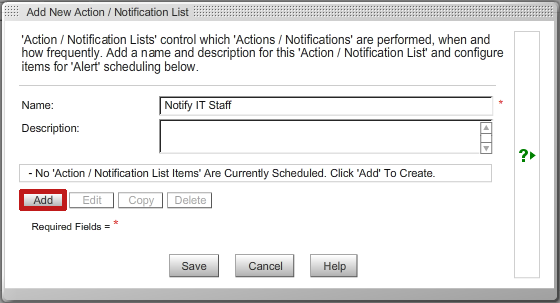
5. In the Add New Action / Notification List window that appears:
– In Name, enter a name for your Action / Notification List. In our example, we’re calling our list ‘Notify IT Staff.’
– (Optional) In Description, you may enter notes you feel may be helpful.
– Then select Add.
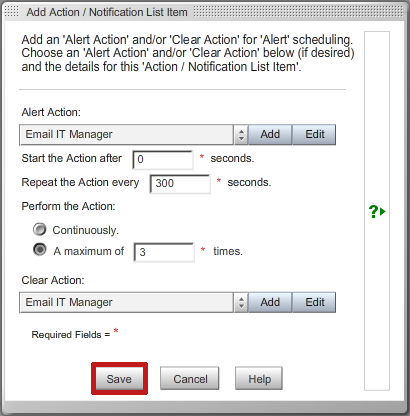
6. In the Add Action / Notification List Item window that appears:
– In Alert Action, select the action you want executed when the alert condition is triggered. In this example, we are selecting our Email IT Manager Action.
– In Start the Action after X seconds, you may leave the default, 0, to have the action begin immediately after the trigger, or enter a higher number of seconds to delay the start of the action. We’ve left the default of 0 in our example.
– In Repeat the Action every X seconds, you may leave the default, 60, or enter another value to control how frequently the action repeats. In our example, we’ve entered ‘300’ (seconds) in order to send emails at 5 minute intervals.
– In Perform the Action, you may leave the default, Continuously, or cap the number of times the action is performed by selecting A maximum of X times. You may leave the default of 1 or enter a higher value. In our example, we’ve capped the repetitions at 3.
– In Clear Action, you may select an action you have configured if you want that action performed when the Alert condition clears. In this case, we are selecting our Email IT Manager action so that contact receives a ‘clear’ notification.
– Select Save to save your Action / Notification List Item and return to the Add New Action Notification List window.
7. To add more Action / Notification List Items to your Action / Notification List, select Add again and repeat the steps above. You may add as many items to your list as you wish. In the example below, we’ve gathered the four email notification actions we set up earlier into the ‘Notify IT Staff’ list.

8. When you are ready to save your Action / Notification List, select Save.
Once you’ve saved your Action / Notification List, the final step is to associate it with an alert.
To create an alert in Device ManageR, follow these steps:
1. Open Device ManageR in your web browser. You may open it by entering ‘localhost:8080’ or ‘<IP address of Device ManageR host system>:8080’ in your browser’s address bar.
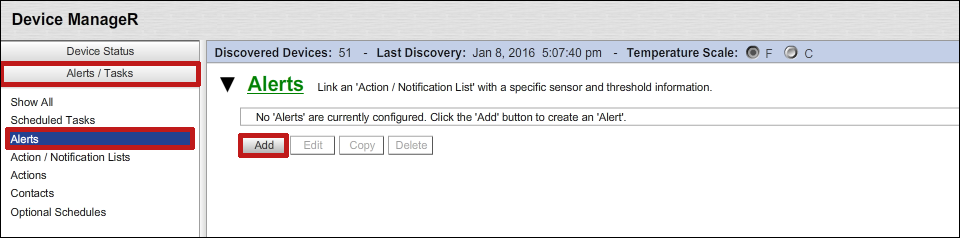
2. Select Alerts / Tasks in the navigation bar to the left.
3. In the Alerts / Tasks menu, select Alerts.
4. To add your first alert, select Add.
5. In the Add New Alert screen that appears:
– In Name, enter a name for your alert. Our example is called ‘Data Center Temperature > 80 F.’
– In Device, select your Room Alert from the drop-down list. We’re choosing the Room Alert 32E in our data center.
– In Alarm when…, you’ll then see a drop-down list with all of the unit’s individual sensors. Select the specific sensor you wish to alert on. In our example, we’re choosing Internal Sensor – Temperature (F).
– In is, set the threshold for that sensor. The fields that appear here depend on the type of sensor you’ve chosen. In our example, we have a comparison and value field.
– First, select from the Comparison Value drop-down list. In our example, we’re choosing greater than (>).
– Then, in value, enter the number that makes sense for the scale you’re using. In our example, we are measuring temperature in Fahrenheit, so we’re going to enter 80 (degrees Fahrenheit).
– In Alarm if item is unavailable for X scans, you may leave the default, 4 scans, or enter another value. You may also disable this feature if you wish by unchecking the check box. In our example, we’re leaving the default.
– In Action / Notification List, select an already-configured list from the drop-down menu or create a new one by selecting Add. Here we’re choosing the ‘Notify IT Staff’ Action / Notification List that we assembled in the previous step.
– Then select Save.

You’ve now created your first alert in Device ManageR. In our example alert, four contacts from an IT department will be notified by email (or email-to-SMS) when the temperature in their data center climbs above 80° F.
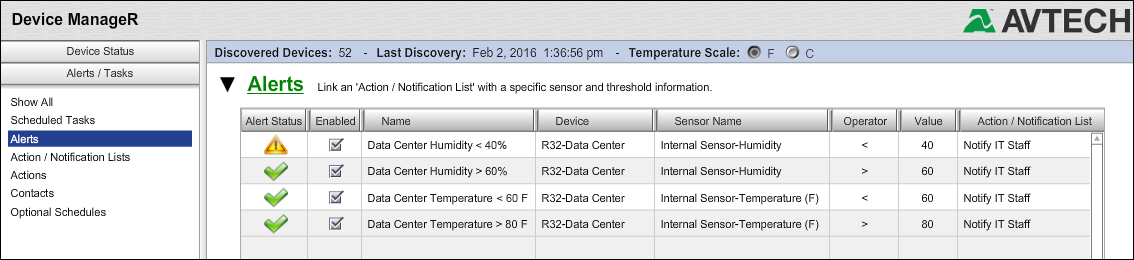
You may repeat this process to create more alerts. You may also use the same Action / Notification List over and over again for different alerts, as we have in the example below:
We'd love to talk with you about your monitoring needs. Contact one of our Product Specialists for a free consultation.


You may find Windows Command Prompt at the following path:
To run Windows Command Prompt as an administrator:

If you are using this client, you should configure the general SNMPv3 Credentials, but leave the Read / Write SNMPv3 Credentials section blank.
| Current S models | Current E models |
|---|---|
| Room Alert 32S | Room Alert 32E |
| Room Alert 12S | Room Alert 12E |
| Room Alert 3S | Room Alert 4E |
| Room Alert 3E | |
| S models | E & W models |
|---|---|
| Room Alert 32S | Room Alert 32E |
| Room Alert 12S | Room Alert 12E |
| Room Alert 3S | Room Alert 4E |
| Room Alert 3E | |
| Room Alert 3W |
| Model |
|---|
| Room Alert MAX |
| Room Alert 32S |
| Room Alert 12S |
| Room Alert 3S |
| Room Alert 32E/W |
| Room Alert 12E |
| Room Alert 4E |
| Room Alert 3E |
| Room Alert 3 Wi-Fi |
