Follow the steps below to set up Device ManageR:
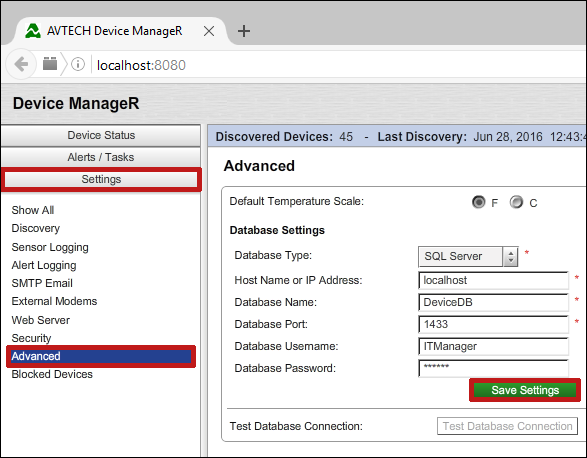
1. Open Device ManageR in your web browser. You may open it by entering ‘localhost:8080’ or ‘<IP address of host system>:8080’ in your browser’s address bar.
2. Select Settings in the navigation bar to the left.
3. In the Settings menu, select Advanced.
4. In Database Settings, follow these steps:
a. In Database Type, select SQL Server.
b. If Device ManageR and your SQL Server are installed on the same computer, leave “localhost” in Host Name or IP Address, as we have in our example. Otherwise, enter your SQL Server’s hostname or IP address.
c. In Database Name, enter the name you gave your SQL Server database. In our example, our database name is “DeviceDB.”
d. In Database Port, enter your SQL Server database port. The default SQL Server port is 1433, which is what we retained in our example.
e. In Database Username, enter the username you created for your SQL Server. In our example, our username is “ITManager.”
f. In Database Password, enter the password you gave to that username.

5. Select Save Settings.
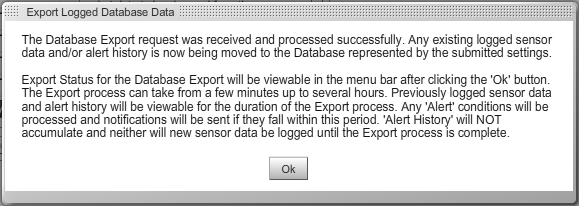
6. The Export Logged Database Data dialog box will appear, asking if you’d like to export your currently-logged data to your new SQL Server database.

a. If you do want to export your existing data, select Export.
– When the confirmation message appears, select OK.

– You’ll see progress bars at the top of the Device ManageR window showing the progress of the export. Depending on the size of your existing database, the export can take from a few minutes to up to several hours.

b. If you don’t want to export your existing data, select Save Settings. You’ll start fresh with an empty SQL Server database.
Note that you can test Device ManageR’s connection to your SQL Server database any time (after you save your settings) by selecting Test Database Connection.

