Support

Knowledge Base  /  Frequently Asked Questions  /  Device ManageR (Legacy)

What To Expect From Device ManageR After Adobe Flash Player Is Discontinued

Adobe Flash Playerwhich is used to run Device ManageR’s web interfacehas been discontinued. As of January 12, 2021, Adobe will block all content from running in Flash Player, rendering Device ManageR’s web interface inaccessible. As a result of a “kill switch” built into Adobe Flash player, even old versions of web browsers will no longer load Device ManageR.

Even though its web interface will no longer be accessible, as long as Device ManageR’s service is still running on your system, the software will continue to notify you when alerts are triggered.

Still using Device ManageR? We recommend switching to AVTECH’s new Room Alert Manager software. Just like with Device ManageR, you may use Room Alert Manager to discover your Room Alert Monitors, configure alerts and export historical sensor data.

How to continue using Device ManageR after January 12, 2021

Device ManageR runs as a Windows service. Although you can no longer access the software’s web interface, Device ManageR will continue to do its job invisibly as long as its service is running.

You may wish to keep the service running if…

  • You’re monitoring a device, such as a legacy model Room Alert, TemPageR or Axis camera that isn’t supported in Room Alert Manager.
  • You’re using advanced features, such as GSM modem actions or automated system shutdowns, that haven’t been added to Room Alert Manager yet.
  • For more information, please see our FAQ: Supported Devices And Features In Room Alert Manager.

Alerts still work!

  • Even though you can’t view your alerts in Device ManageR’s web interface, any alerts that you already created are still operating as they always have.
  • The software will continue to monitor data from your devices and perform configured actions in response to alert conditions and schedules.

Adobe Flash is only used for the front-end portion of Device ManageR (its web interface), not for its underlying service.

  • The web interface is where you could previously view/edit your settings and alert configurations, but this information isn’t stored in the web interface.
  • All of Device ManageR’s settings and alert configurations are stored in the software’s program files (.XML files) on the computer where the software is installed.

The tabs below show you how to confirm that Device ManageR is still running and that your settings & alert configurations are accurate.

How to check if Device ManageR is running

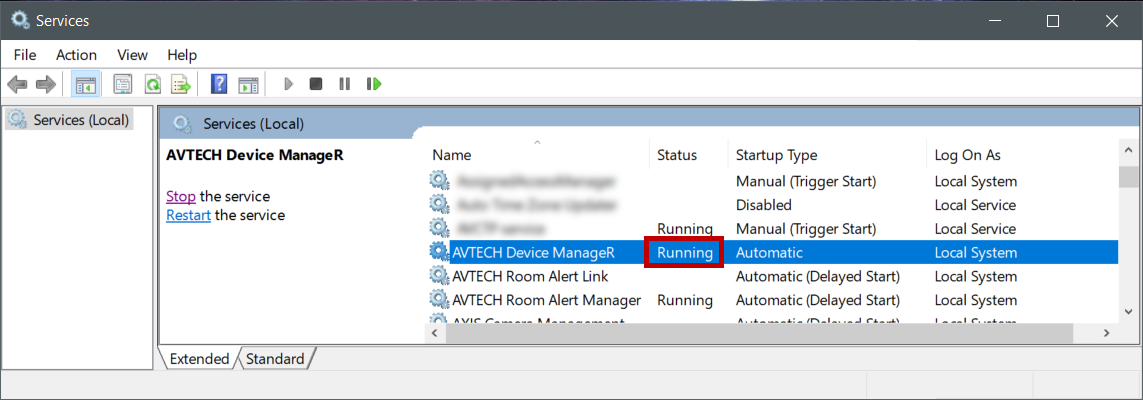
You may confirm that Device ManageR is running by following these steps:

  1. Open the Services tool in the Windows system that Device ManageR is installed on.
    • You may find Services at the following path: Start–> Control Panel–> Administrative Tools–> Services.
  2. Locate AVTECH Device ManageR in the list of programs.
  3. The Status column will display Running if the service is running.
    • Otherwise, the status will be blank.
  4. If the service is running, the options to the left of the screen will be Stop and Restart.
    • If the service is not running, the only available option will be Start.
How to view your alert configurations

You may view your Device ManageR alert configurations by viewing the software’s .XML files in your web browser or in a text editor.

  1. First, locate Device ManageR’s installation directory.
    • By default, you can find it at C:\Program Files\AVTECH Device ManageR or C:\Program Files (x86)\AVTECH Device ManageR.
  2. In Device ManageR’s installation directory, open the “conf” folder.
  3. In the “conf” folder, you’ll see program files containing Device ManageR’s settings and alert configurations, as show below:
  4. When you initially set up alerts in Device ManageR, you had to create these individual components:
    1. First you set up individual Contacts. (This is where a user’s email address and phone number are stored).
    2. Next you created Actions. You could create notification actions (like an email action that is associated with a particular contact) or a different type of action, such as a relay toggle or system shutdown action.
    3. Then you created Action/Notification Lists. These lists are how you associated an action or group of actions with individual alerts.
    4. Finally you created Alerts on Room Alert or TemPageR devices, Axis cameras or external pings.
  5. These alert configurations are stored in separate files:
    • contacts.xml contains your Contacts
    • actions.xml contains your Actions
    • action_schedules.xml contains your Action/Notification Lists
    • alerts.xml contains your Alerts
  6. To view Device ManageR’s alert configurations, open the desired .xml file through your browser or in a text editing program, such as Notepad or Notepad++.
  7. The tabs below show example .xml files loaded in Notepad++:
contacts.xmlactions.xmlaction_schedules.xmlalerts.xml

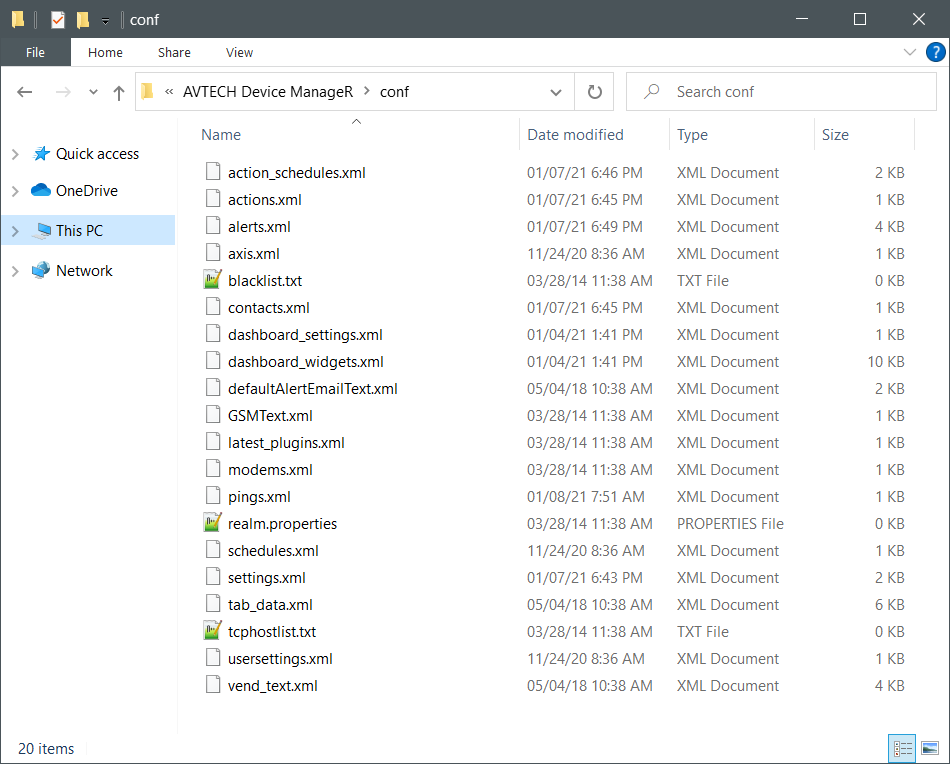
Shown below is an example contacts.xml file loaded in Notepad++:

This file shows us that we currently have two contacts configured and enabled: IT Mgr and Facilities Mgr.

Shown below is an example actions.xml file loaded in Notepad++:

This file shows us that we currently have two actions configured and enabled: one to email our IT Mgr and one to email Facilities.

Shown below is an example action_schedules.xml file loaded in Notepad++:

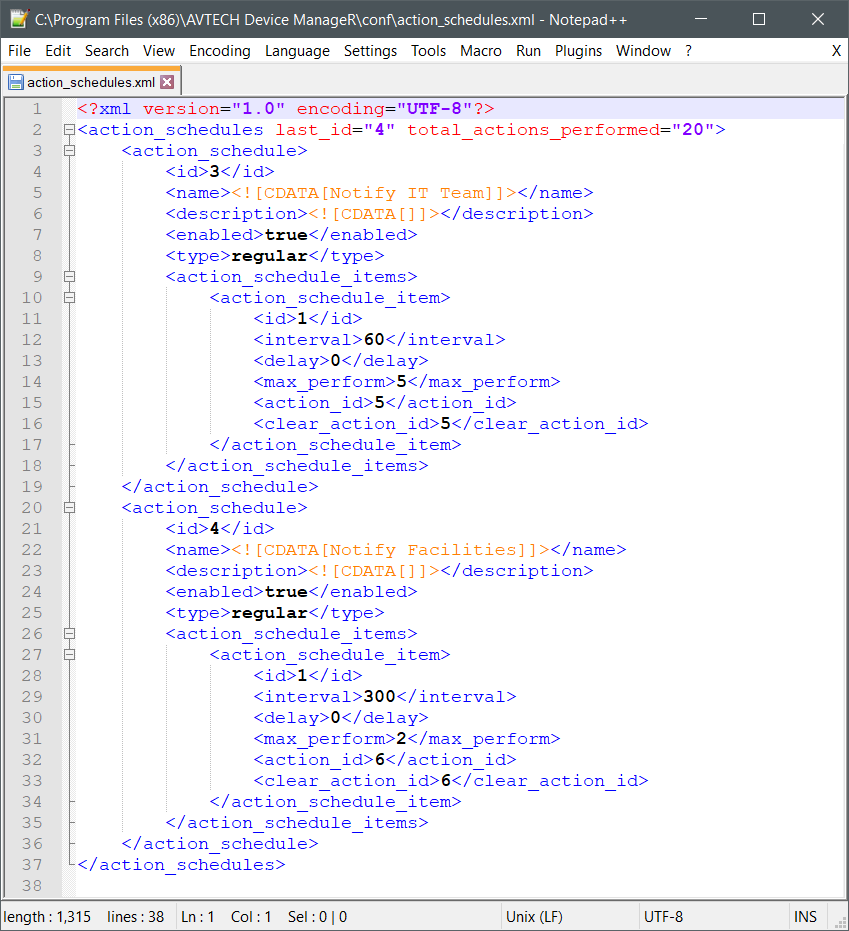
This file shows us that we currently have two Action/Notification Lists configured and enabled. One list notifies our IT team every minute (60 seconds) for a maximum of 5 times. The other list notifies our Facilities team every 5 minutes (300 seconds) for a maximum of 2 times.

Shown below is an example alerts.xml file loaded in Notepad++. (In order to keep our screenshot small, we collapsed some of the information.)

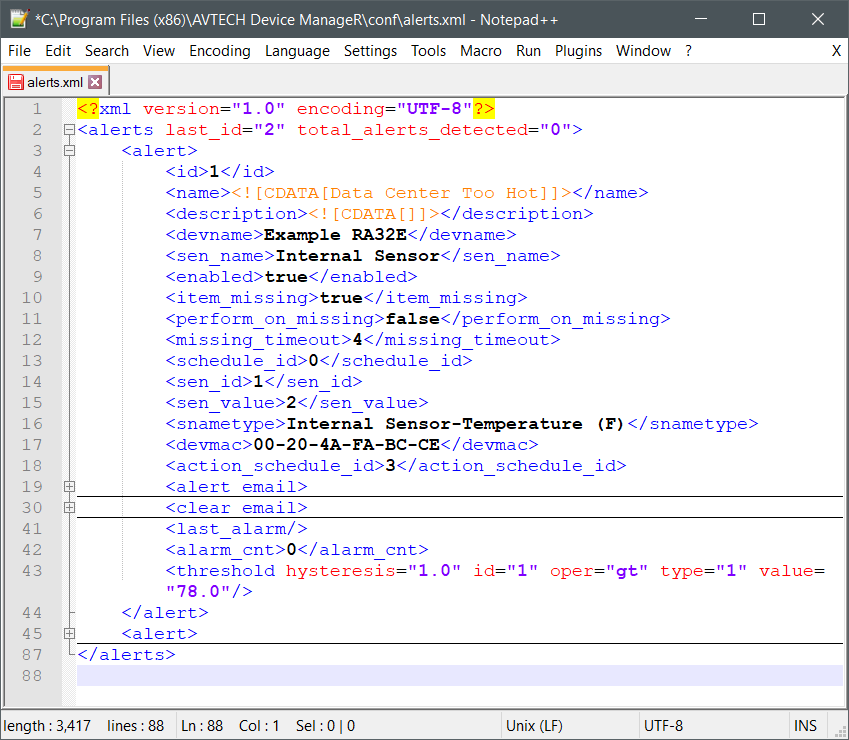
This file shows us that we currently have two alerts configured and enabled, although our second alert is hidden in this screenshot. We can see that our first alert, Data Center Too Hot, triggers when the internal sensor on our device, Example RA32E, goes above 78° Fahrenheit.

It is possible to make minor changes to alert configurations in Device ManageR’s .XML files through a text editor program, such as Notepad or Notepad++.

If you need to make a minor change, you must do so with caution. If the file is edited incorrectly, Device ManageR may no longer perform properly.

If you make any changes to an .XML file, you must first stop the Device ManageR service.

How to view your Device ManageR settings

You may view your Device ManageR settings by viewing the software’s .XML files in your web browser or in a text editor.

  1. First, locate Device ManageR’s installation directory.
    • By default, you can find it at C:\Program Files\AVTECH Device ManageR or C:\Program Files (x86)\AVTECH Device ManageR.
  2. In Device ManageR’s installation directory, open the “conf” folder.
  3. In the “conf” folder, you’ll see program files containing Device ManageR’s settings and alert configurations, as show below:
  4. To view Device ManageR’s settings, open the settings.xml file.
    • You may view the contents of the .xml file through your browser or open it in a text editing program, such as Notepad or Notepad++.
  5. Shown below is an example settings.xml file loaded in Notepad++:
  6. For our example, we’re going to focus on our primary mail server settings:
  7. In the <mailserver1> section of the settings.xml file, we see the following:
    • <username>: the username is encoded, so we cannot easily view or edit this.
    • <timeout>: the mail server timeout value is 15 seconds.
    • <server>: our mail server domain is mail.example.com.
    • <pass>: our password has been encoded, so we cannot easily view or edit this.
    • <sender>: our emails are configured to send from Sender@Example.com.
    • <use_ssl>: our mail server is not using SSL encryption, so this is set to false.
    • <use_tls>: our mail server is not using TLS encryption, so this is set to false.
    • <port>: our mail server port is 25.
    • <test_recipient>: you can view the test email recipient, but this email address would only be used if a test email was sent through Device ManageR’s web interface.

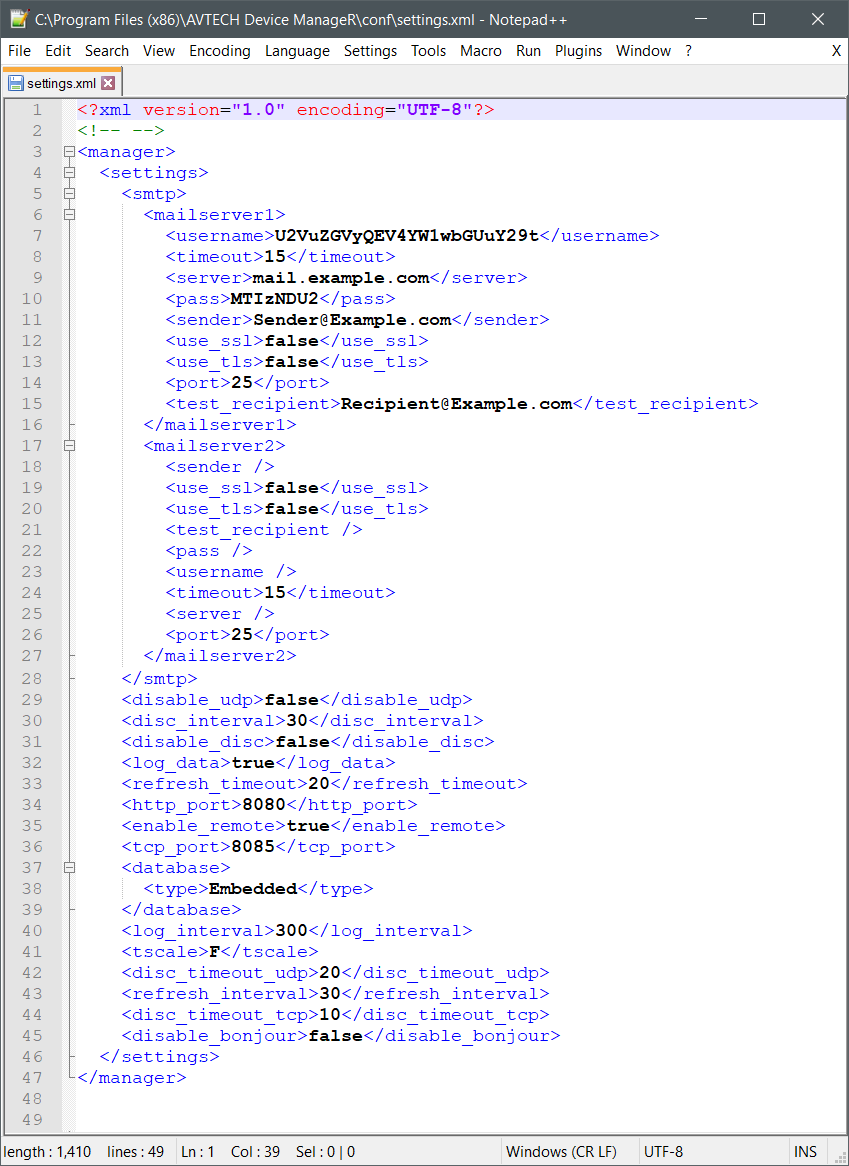
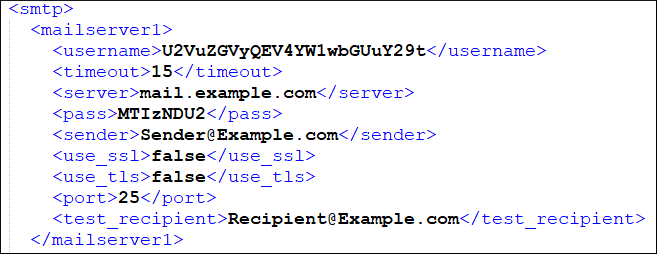
It is possible to make minor changes to the settings in Device ManageR’s .XML files through a text editor program, such as Notepad or Notepad++.

If you need to make a minor change, you must do so with caution. If the file is edited incorrectly, Device ManageR may no longer perform properly.

If you make any changes to an .XML file, you must first stop the Device ManageR service.

Facebooktwitterredditpinterestlinkedinmail
Room Alert is Made in the USA, ships worldwide from our locations in the US and EU, and has been protecting facilities since 1988.

You may find Windows Command Prompt at the following path:

  • Windows 7 & 8
    Start--> All Programs--> Accessories--> Command Prompt
  • Windows 10
    Start--> All Apps--> Windows System--> Command Prompt

To run Windows Command Prompt as an administrator:

  • Windows 7 & 8
    Right-click on Command Prompt and select Run as administrator.
  • Windows 10
    Right-click on Command Prompt, select More and then select Run as administrator.

Example Polling Method Properties saved in Orion SolarWinds:

If you are using this client, you should configure the general SNMPv3 Credentials, but leave the Read / Write SNMPv3 Credentials section blank.

Room Alert Link- Supported Firmware Updates


Current S modelsCurrent E models
Room Alert 32SRoom Alert 32E
Room Alert 12SRoom Alert 12E
Room Alert 4E
Room Alert 3E

Room Alert Manager - Compatible Devices

The latest version of Room Alert Manager supports only the devices below.

It does not support any legacy Room Alert or TemPageR models.

Current S modelsCurrent E models
Room Alert 32SRoom Alert 32E
Room Alert 12SRoom Alert 12E
Room Alert 3SRoom Alert 4E
Room Alert 3E
Room Alert 3W