Support

Knowledge Base  /  Frequently Asked Questions  /  Device Discovery Utility

How To Discover AVTECH Devices With The Device Discovery Utility

You may discover your “E” or “W” model Room Alert Monitor (not “S” models) using AVTECH’s Device ManageR software or AVTECH’s Device Discovery utility. Device ManageR can additionally discover Axis cameras on your network.

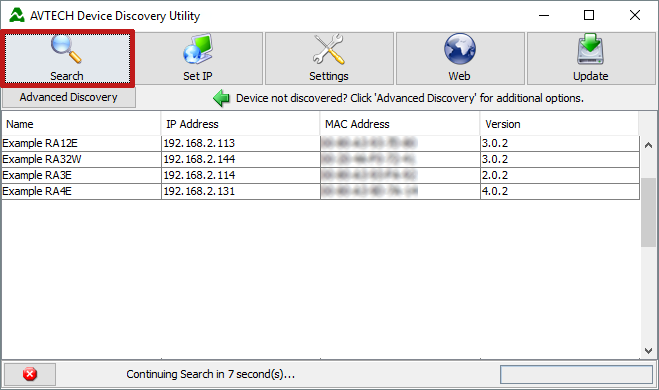
Device Discovery scans your network in the following ways:

This FAQ shows you how to use Device Discovery to scan for your devices; please see our FAQ How To Discover AVTECH Devices With Device ManageR for information about Device ManageR.

Automatic Discovery With AVTECH's Device Discovery
  1. Open the Device Discovery utility. You may find it in your Windows system typically through the default path: C:\Program Files\AVTECH Device Discovery Utility.
  2. Select Search. Device Discovery then scans your network using a broadcast on UDP Port 30718 to find your Room Alert Monitor.
  3. After a moment, your devices will populate the screen as shown below:
  4. Once you’ve selected Search, automatic discovery continues to repeat every 60 seconds until you either select Stop at the bottom of the window or close the program.
Advanced Discovery With AVTECH's Device Discovery

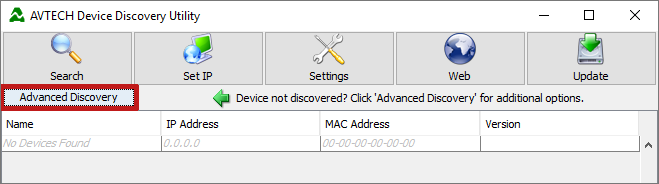
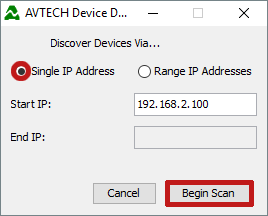
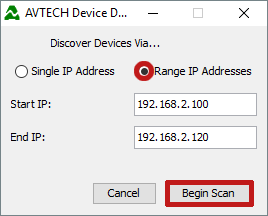
If your device does not appear with automatic discovery, try using the advanced discovery feature, which searches with a UDP unicast rather than a UDP broadast.

  1. Select Advanced Discovery.
  2. When the Discover Devices Via . . . pop-up appears, you may choose Single IP Address or Range IP Addresses.
    • Single IP Address
      This is a good option when you already know the IP address of the device you’re looking for, but the search initiated by the Search button didn’t find it.
      • Select Single IP Address.
      • In Start IP, enter the IP address.
    • Range Of IP Addresses
      This is a good option when you’d like to search only a portion of your network for devices.
      • Select Range IP Addresses.
      • In Start IP and End IP, enter the first and last address in the range you’d like to look in.
  3. Select Begin Scan. Device Discovery then scans your network using UDP Port 30718.
  4. Your device (or devices) will then populate the screen.
Discovery Using A MAC Address With AVTECH's Device Discovery

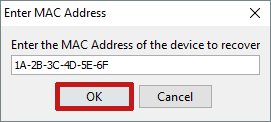
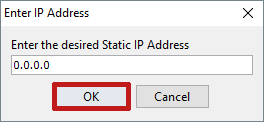
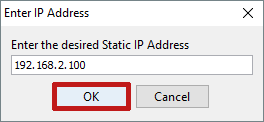
If your device does not appear with automatic and advanced discovery, try setting an IP address using your device’s MAC address.

  1. Do not select any units in the list of discovered devices in your Device Discovery screen.
  2. Select Set IP.
  3. When the Device Not Selected alert box appears, select OK.
  4. When the Enter MAC Address dialog box appears, enter the MAC address of your unit. Please see our FAQ, Where To Find The MAC Address Of A Room Alert Monitor, if you’re not sure of the MAC.
  5. Then select OK.
  6. When the Enter IP Address dialog box appears, you may tell your device to use DHCP or you may assign it a static IP.
    • Enter 0.0.0.0 to get your unit to obtain an IP address using DHCP.
    • Enter an IP address to assign a static address to your device. Please note that this assigns only the IP; it does not assign the other necessary network settings of subnet mask, default gateway and DNS server.
  7. Then select OK.
  8. Your device will reboot with it’s new settings (either DHCP or a static address), and should then appear in the list of discovered devices.
  9. If you entered a static IP address in Step 6 (rather than entering 0.0.0.0 for DHCP), open the Room Alert’s web interface and complete the IP settings for the subnet mask, default gateway and DNS server. Device Discovery does not set these for you. Please see this FAQ for instructions: How To Set A Static IP Address On Room Alert Monitor – Setting a static IP using Room Alert Monitor’s web interface.
Facebooktwitterredditpinterestlinkedinmail
Room Alert is Made in the USA, ships worldwide from our locations in the US and EU, and has been protecting facilities since 1988.

You may find Windows Command Prompt at the following path:

  • Windows 7 & 8
    Start--> All Programs--> Accessories--> Command Prompt
  • Windows 10
    Start--> All Apps--> Windows System--> Command Prompt

To run Windows Command Prompt as an administrator:

  • Windows 7 & 8
    Right-click on Command Prompt and select Run as administrator.
  • Windows 10
    Right-click on Command Prompt, select More and then select Run as administrator.

Example Polling Method Properties saved in Orion SolarWinds:

If you are using this client, you should configure the general SNMPv3 Credentials, but leave the Read / Write SNMPv3 Credentials section blank.

Room Alert Link- Supported Firmware Updates


Current S modelsCurrent E models
Room Alert 32SRoom Alert 32E
Room Alert 12SRoom Alert 12E
Room Alert 4E
Room Alert 3E

Room Alert Manager - Compatible Devices

The latest version of Room Alert Manager supports only the devices below.

It does not support any legacy Room Alert or TemPageR models.

Current S modelsCurrent E models
Room Alert 32SRoom Alert 32E
Room Alert 12SRoom Alert 12E
Room Alert 3SRoom Alert 4E
Room Alert 3E
Room Alert 3W

Current & Legacy Room Alert "E" & "W" Models

Current ModelsLegacy Models
Room Alert 32ERoom Alert 32W
Room Alert 12ERoom Alert 26W
Room Alert 4ERoom Alert 24E
Room Alert 3ERoom Alert 11E
Room Alert 3 Wi-FiRoom Alert 7E
TemPageR 4E
TemPageR 3E