
Knowledge Base / Frequently Asked Questions / Device ManageR (Legacy)
Before you attempt to configure your dial-out or GSM modem in Device ManageR, please download and install the Dial Out Plugin Bundle from your account at RoomAlert.com.
Ensure you connect your external modem to Device ManageR’s host system:
– Dial-out notifications require a Hayes-compatible analog modem.
– GSM notification require a GSM/GPRS modem compatible with industry-standard GSM AT commands.
1. Open Device ManageR in your web browser. You may open it by entering ‘localhost:8080’ or ‘<IP address of host system>:8080’ in your browser’s address bar.
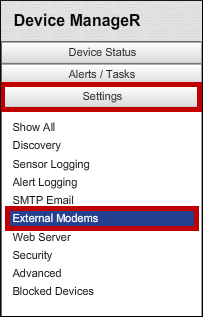
2. Select Settings in the navigation bar to the left.
3. In the Settings menu, select External Modems.
4. In the External Modems page, locate the Dial Out Modem section.
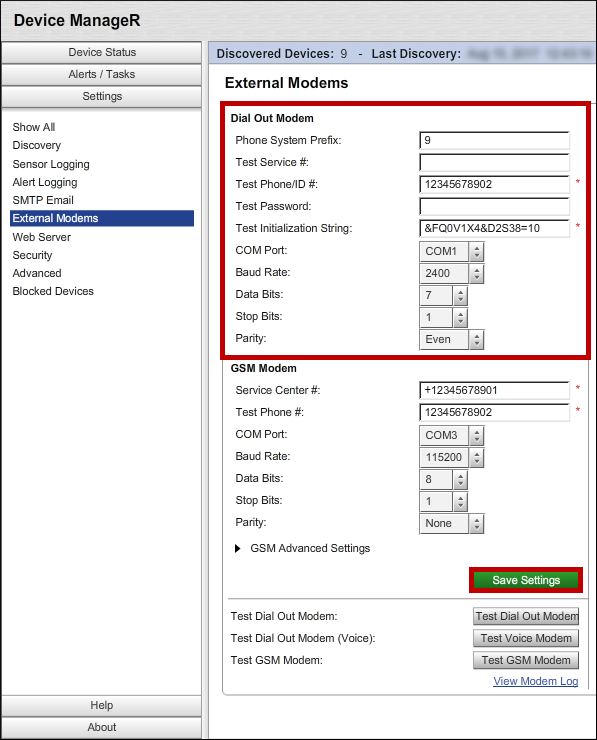
– In Phone System Prefix, enter the number required to access an outside line. Many phone systems, for example, require ‘9’ to make an outside call.
– If you are using TAP, enter a Test Service #. Otherwise, leave this field blank.
– In Test Phone/ID #, enter a phone number to send a test message to once you’ve finished configuring your modem.
– If you are using TAP, and your TAP service requires a password, enter a Test Password. Otherwise, leave this field blank.
– In Test Initialization String, leave the default string (&FQ0V1X4&D2S38=10). It configures the modem so that Device ManageR can use it.
– In COM Port, select the port that your modem is using on Device ManageR’s host system.
To find the port, please see our FAQ, How To Check The COM Port Of Your Modem.
– For direct dial, select the following in Baud Rate, Data Bits, Stop Bits and Parity:
Baud Rate: 2400
Data Bits: 7
Stop Bits: 1
Parity: Even
If you are using TAP, check with your service provider for the correct settings.
5. Select Save Settings to save your changes.
6. Then send a test message to the number you entered in Test Phone.
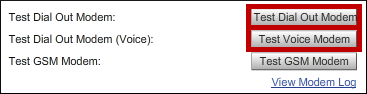
– Select Test Voice Modem to test playing alerts over the phone.
– Select Test Dial Out Modem to test text messaging through a TAP service or dial tones through direct dial.
1. Open Device ManageR in your web browser. You may open it by entering ‘localhost:8080’ or ‘<IP address of host system>:8080’ in your browser’s address bar.
2. Select Settings in the navigation bar to the left.
3. In the Settings menu, select External Modems.
4. In the External Modems page, locate the GSM Modem section.
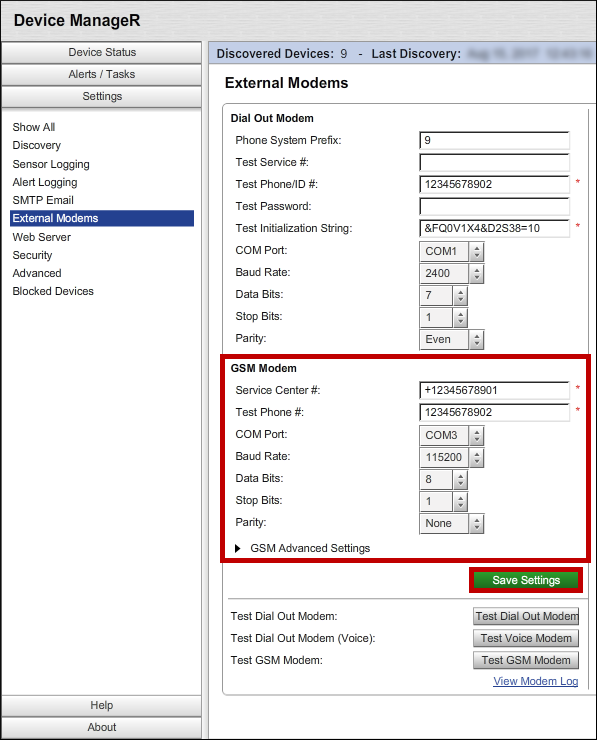
– In Service Center #, enter your cellular service provider’s service center number
– In Test Phone #, enter a phone number to send a test message to once you’ve finished configuring your modem.
– In COM Port, select the port that your modem is using on Device ManageR’s host system.
To find the port, please see our FAQ, How To Check The COM Port Of Your Modem.
– In Baud Rate, Data Bits, Stop Bits and Parity, select the following:
Baud Rate: 115200
Data Bits: 8
Stop Bits: 1
Parity: None
– Leave GSM Advanced Settings at the default. This section contains the script that Device ManageR uses to send notifications.
5. Select Save Settings to save your changes.
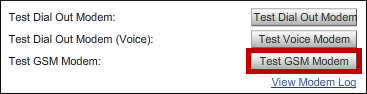
6. Then select Test GSM Modem to send a test message to the number you entered in Test Phone #.
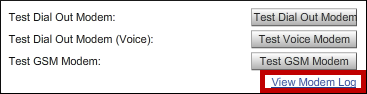
If you need to troubleshoot your modem’s configuration, you may find it useful to view the log. Select View Modem Log to download the .log file, which you may view in any text editor, such as Notepad.
For more information about dial-out and GSM notifications, please see the following FAQs:
– How To Configure A GSM Action In Device ManageR
– How To Configure A Dial Out Modem Action in Device ManageR
We'd love to talk with you about your monitoring needs. Contact one of our Product Specialists for a free consultation.


You may find Windows Command Prompt at the following path:
To run Windows Command Prompt as an administrator:

If you are using this client, you should configure the general SNMPv3 Credentials, but leave the Read / Write SNMPv3 Credentials section blank.
| Current S models | Current E models |
|---|---|
| Room Alert 32S | Room Alert 32E |
| Room Alert 12S | Room Alert 12E |
| Room Alert 3S | Room Alert 4E |
| Room Alert 3E | |
| S models | E & W models |
|---|---|
| Room Alert 32S | Room Alert 32E |
| Room Alert 12S | Room Alert 12E |
| Room Alert 3S | Room Alert 4E |
| Room Alert 3E | |
| Room Alert 3W |
| Model |
|---|
| Room Alert MAX |
| Room Alert 32S |
| Room Alert 12S |
| Room Alert 3S |
| Room Alert 32E/W |
| Room Alert 12E |
| Room Alert 4E |
| Room Alert 3E |
| Room Alert 3 Wi-Fi |
