
Knowledge Base / Frequently Asked Questions / Device ManageR (Legacy)
To create a GSM modem action in Device ManageR, you must have the Dial Out Plugin Bundle installed. If your organization has a service plan at the Professional level or higher, you may download it from your account at RoomAlert.com.
To set up a GSM modem action in Device ManageR, follow these steps:
1. Open Device ManageR in your web browser. You may open it by entering ‘localhost:8080’ or ‘<IP address of Device ManageR’s host system>:8080’ in your browser’s address bar.
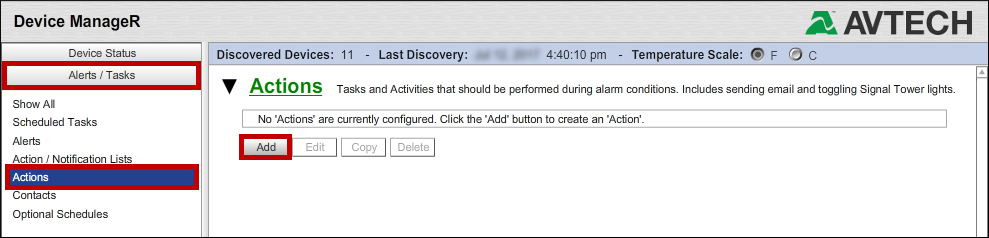
2. Select Alerts / Tasks in the navigation bar to the left.
3. In the Settings menu, select Actions.
4. Select Add at the bottom of the screen to open the Add New Action window.
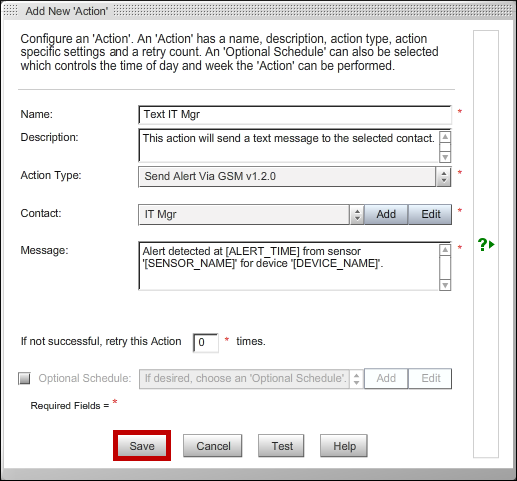
5. In the Add New Action window, enter a name for the action in Name. In our example, we’ve called the action ‘Send GSM text to IT Mgr.’
6. (Optional) In Description, you may, if you wish, enter any notes you feel would be helpful.
7. In Action Type, select the action you wish to execute from the drop-down list. Once you make your selection, options unique to that action will appear.
– In Action Type, select Send Alert Via GSM from the drop-down list. The unique options for this action type are the Contact and Message fields.
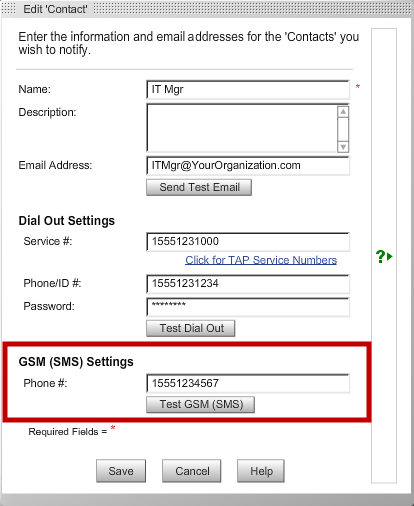
– In Contact, select a contact that has a phone number entered in the GSM (SMS) Settings field of their contact record. An example is shown below:
– In Message, you may leave the default message or edit it. The default message is shown in the screenshot below.
To edit the message, put your cursor in the Message field. You may edit the text and insert new keywords by selecting the Click to Insert a Keyword button.
8. In If not successful, retry this Action, you may leave the default, 0, or enter a higher number.
9. (Optional) If you wish, you may associate a schedule with this action by selecting Optional Schedule and choosing a schedule from the drop-down list. (If you attach a schedule to the action, it can be performed only during the hours you’ve set up in the Optional Schedule.)
10. Then select Save to save the action.
11. Once you’ve saved, your action will appear in your Actions list.
You may now associate this action with an Action / Notification List. Please see this FAQ for more information: How To Configure Action / Notification Lists In Device ManageR.
We'd love to talk with you about your monitoring needs. Contact one of our Product Specialists for a free consultation.


You may find Windows Command Prompt at the following path:
To run Windows Command Prompt as an administrator:

If you are using this client, you should configure the general SNMPv3 Credentials, but leave the Read / Write SNMPv3 Credentials section blank.
| Current S models | Current E models |
|---|---|
| Room Alert 32S | Room Alert 32E |
| Room Alert 12S | Room Alert 12E |
| Room Alert 3S | Room Alert 4E |
| Room Alert 3E | |
| S models | E & W models |
|---|---|
| Room Alert 32S | Room Alert 32E |
| Room Alert 12S | Room Alert 12E |
| Room Alert 3S | Room Alert 4E |
| Room Alert 3E | |
| Room Alert 3W |
| Model |
|---|
| Room Alert MAX |
| Room Alert 32S |
| Room Alert 12S |
| Room Alert 3S |
| Room Alert 32E/W |
| Room Alert 12E |
| Room Alert 4E |
| Room Alert 3E |
| Room Alert 3 Wi-Fi |
