Support

Knowledge Base  /  Frequently Asked Questions  /  Room Alert

How To Set A Static IP Address On A Room Alert Monitor

Using an older version of the Room Alert Monitor web interface? Please click here for the appropriate FAQ.

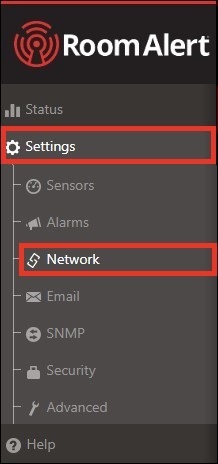
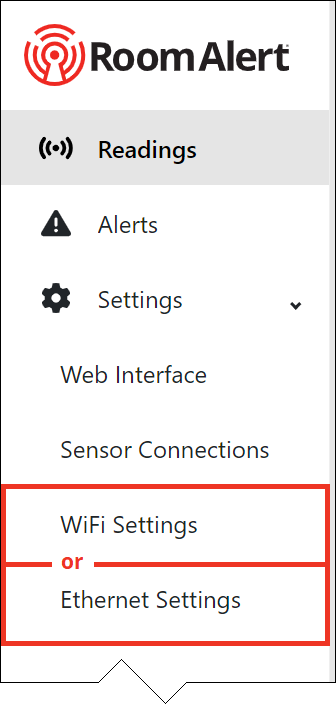
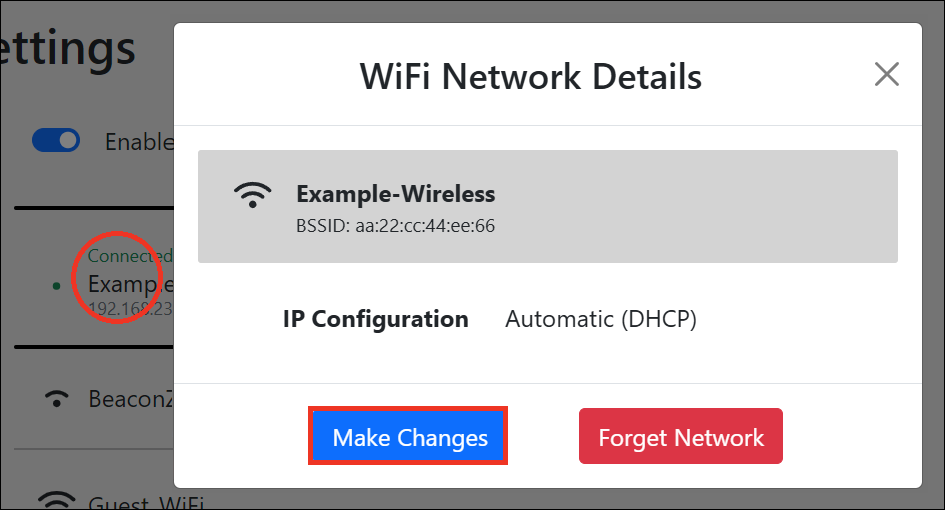
By default, your Room Alert Monitor obtains an IP address automatically using DHCP. You may set a static IP address, if you wish, using one of the following methods:

* Room Alert ‘S’ models are not compatible with the Device Discovery utility.

Setting a static IP using the Room Alert Monitor’s web interface

1. Open your Room Alert Monitor’s web interface. This FAQ has instructions: How To Open Your Room Alert Monitor’s Built-in Web Interface.

2. Select Settings in the navigation bar to the left.

3. The select Network from the options below Settings.

Navigation Bar -- Settings--Network

4. In the IP Address Configuration section of the Network Settings page, select Use The Following IP Configuration. You’ll see the Obtain IP Address Automatically options gray out.

Use The Following IP Configuration

5. Then enter your static IP address information in the following fields:

– IP Address

– Subnet Mask

– Default Gateway

– DNS Server IP

6. Select Save Settings at the top or bottom of the screen. Your Room Alert Monitor will reboot at the new IP address.

Save Settings button

Setting a static IP address using Device Discovery

1. Open the Device Discovery utility. You may find it in your Windows system typically through the default path: C:\Program Files\AVTECH Device Discovery Utility.

2. Select Search. After a moment, your devices will populate the screen.

3. Highlight your Room Alert Monitor by clicking on it once.

4. Then select Set IP.

5. Follow the on-screen prompts to set a static IP address. Please note that this assigns only the IP; it does not assign the other necessary network settings of subnet mask, default gateway and DNS server.

6. Once you’ve completed the last step, your unit will automatically reboot at the new IP address.

7. Once your unit is online again, open its web interface and complete the IP settings for the subnet mask, default gateway and DNS server. Device Discovery does not set these for you. See Setting a static IP using the Room Alert Monitor’s web interface in this FAQ for instructions.

Facebooktwitterredditpinterestlinkedinmail
Room Alert is Made in the USA, ships worldwide from our locations in the US and EU, and has been protecting facilities since 1988.

You may find Windows Command Prompt at the following path:

  • Windows 7 & 8
    Start--> All Programs--> Accessories--> Command Prompt
  • Windows 10
    Start--> All Apps--> Windows System--> Command Prompt

To run Windows Command Prompt as an administrator:

  • Windows 7 & 8
    Right-click on Command Prompt and select Run as administrator.
  • Windows 10
    Right-click on Command Prompt, select More and then select Run as administrator.

Example Polling Method Properties saved in Orion SolarWinds:

If you are using this client, you should configure the general SNMPv3 Credentials, but leave the Read / Write SNMPv3 Credentials section blank.

Room Alert Link- Supported Firmware Updates


Current S modelsCurrent E models
Room Alert 32SRoom Alert 32E
Room Alert 12SRoom Alert 12E
Room Alert 4E
Room Alert 3E

Room Alert Manager - Compatible Devices

The latest version of Room Alert Manager supports only the devices below.

It does not support any legacy Room Alert or TemPageR models.

Current S modelsCurrent E models
Room Alert 32SRoom Alert 32E
Room Alert 12SRoom Alert 12E
Room Alert 3SRoom Alert 4E
Room Alert 3E
Room Alert 3W