
Knowledge Base / Frequently Asked Questions / Room Alert Monitors (PRO, MAX, and Legacy)
Using an older version of the Room Alert Monitor web interface? Please click here for the appropriate FAQ.
In order to send alerts based on the thresholds you configure in the Room Alert Monitor web interface, you must set up SMTP email.
Below is the Email SMTP Settings page shown at defaults.
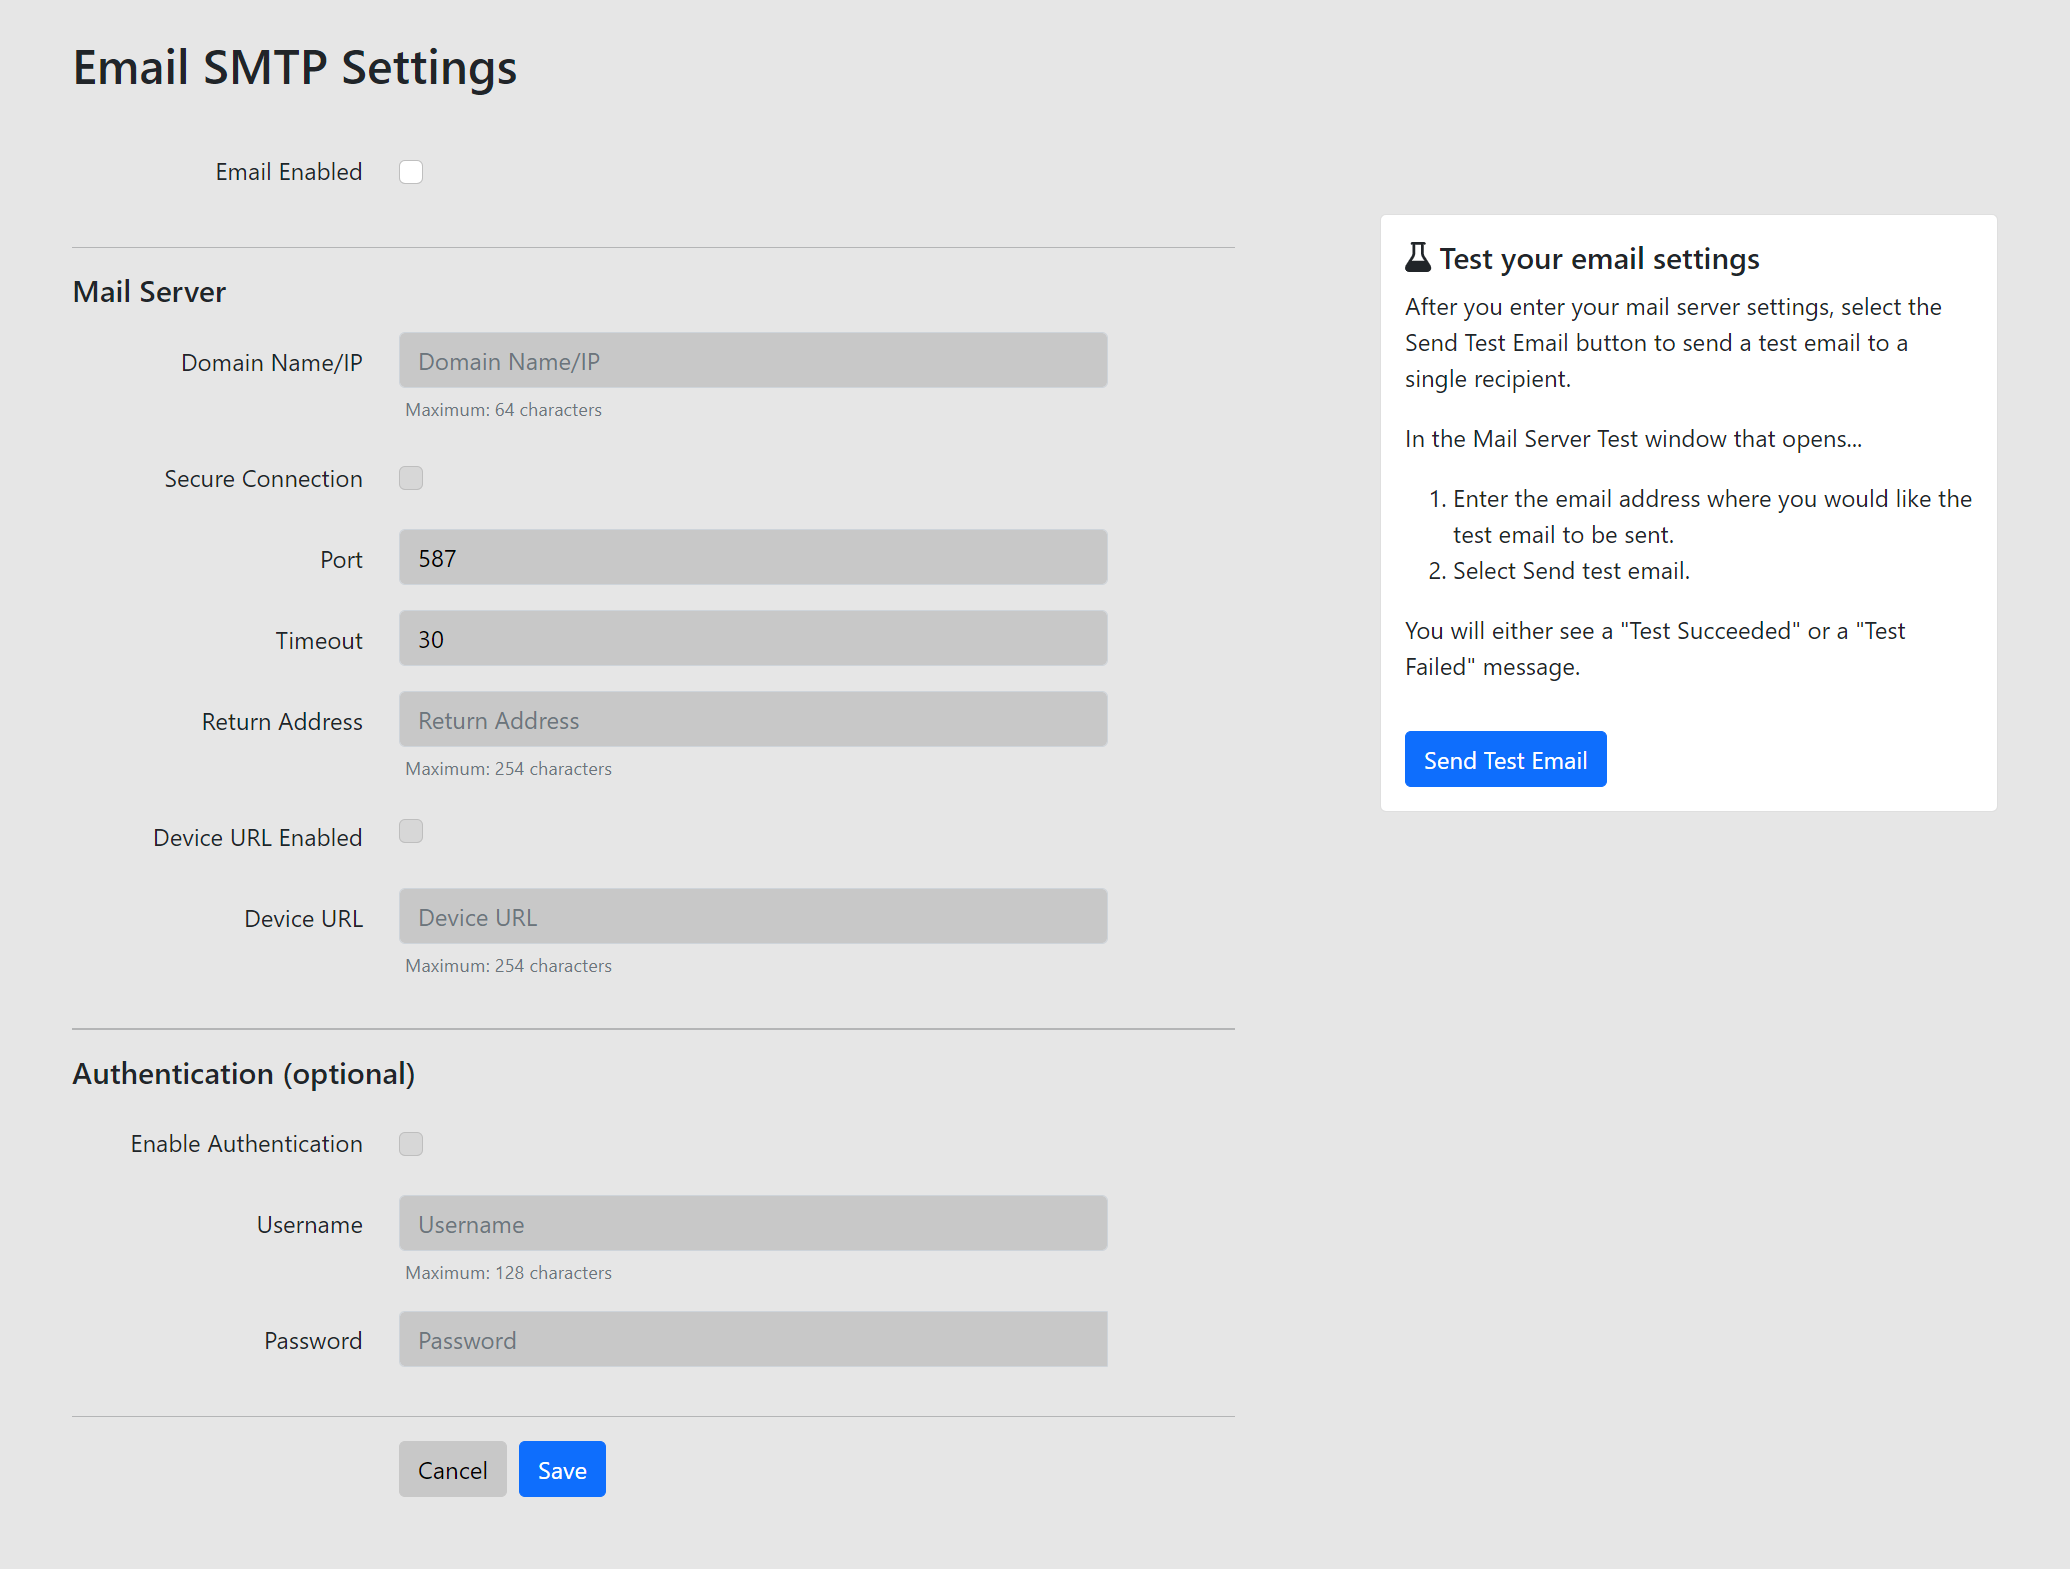
Do not enclose email or email-to-SMS addresses in angle brackets (<>).
1. Select the Email Enabled check box.
2. In Mail Server:
3. In Return Address, enter the email address you want the alerts to come from. This email address must already exist on your mail server.
4. In Device URL Enabled / Device URL:
If the return address email account requires a username and password, enter it here. Otherwise, you may leave all of these fields blank.
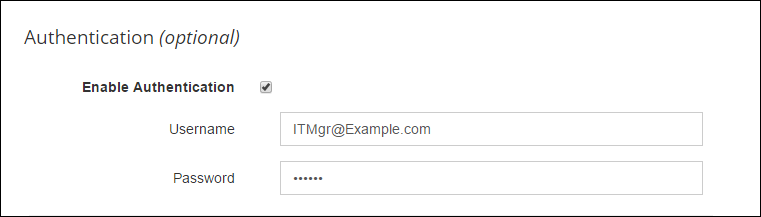
1. Select the Enable Authentication check box.
2. In Username, enter the user name for the return address email address.
3. In Password, select Change and then enter the password.
Select Save at the bottom of the screen.
Select the Send Test Email button to send a test email to any address. You’ll see feedback on screen about whether or not the test was successful.
1. Open your Room Alert Monitor’s web interface. This FAQ has instructions: How To Open Your Room Alert Monitor’s Built-in Web Interface.
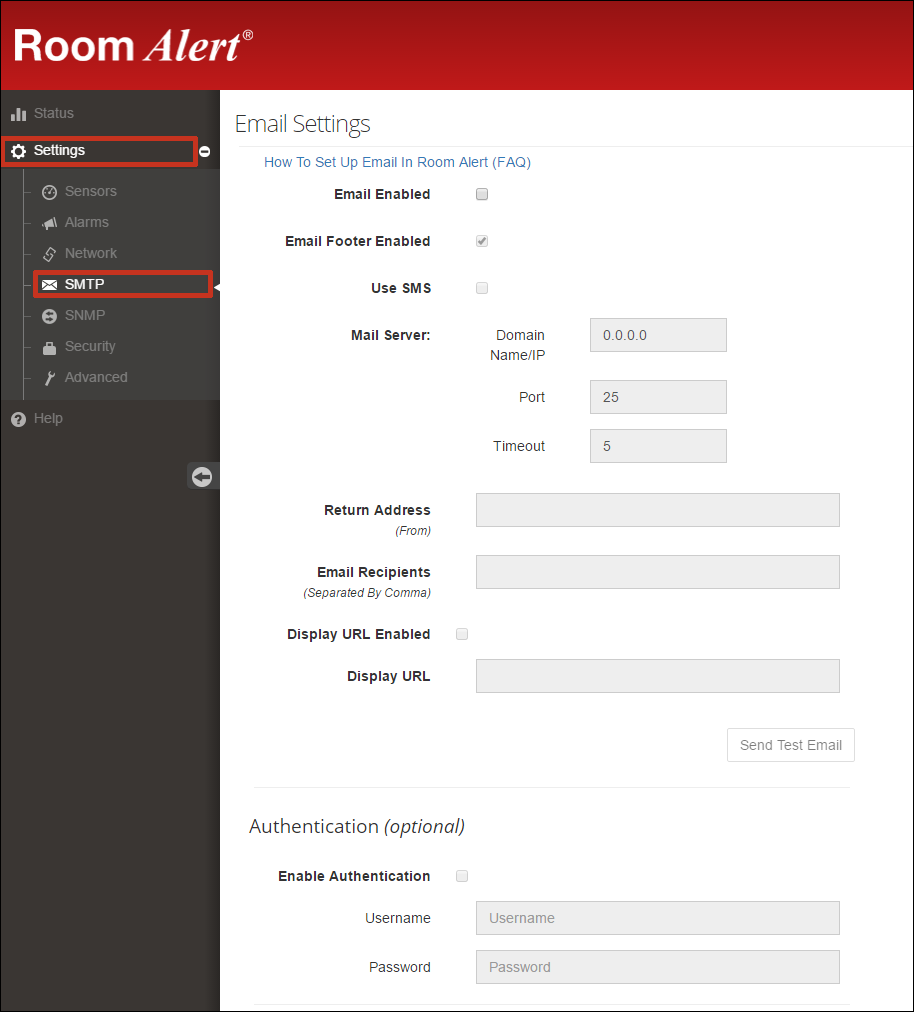
2. Select Settings in the navigation bar to the left.
3. Enter the default credentials or your custom username & password.
4. Once you’re in the Settings pages, select Email from the navigation bar to the left.
Below is the Email Settings page shown at defaults.

Do not enclose email or email-to-SMS addresses in angle brackets (<>).
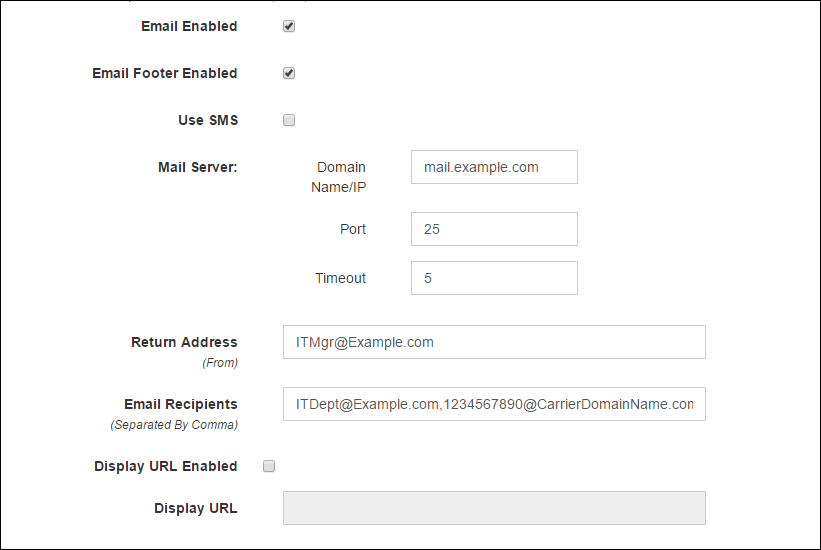
1. Select the Email Enabled check box.
2. In Mail Server:
3. In Return Address, enter the email address you want the alerts to come from. This email address must already exist on your mail server.
4. In Email Recipients, enter 1 or more email addresses to receive alerts.
5. In Device URL Enabled / Device URL:
If the return address email account requires a username and password, enter it here. Otherwise, you may leave all of these fields blank.
1. Select the Enable Authentication check box.
2. In Username, enter the user name for the return address email address.
3. In Password, select Change and then enter the password.
Select Save Settings at the top or bottom of the screen. Your Room Alert Monitor will reboot with your new SNMP email settings.
After your unit has rebooted, select the Send Test Email button to send a test email to all of the recipients in the Email Recipients field.
If you don’t receive the test message, please refer to this FAQ for assistance: What to Do if Email from Your Room Alert Monitor Is Not Working
1. Open your Room Alert Monitor’s web interface. This FAQ has instructions: How To Open Your Room Alert Monitor’s Built-in Web Interface.
2. Navigate to the Email Settings page:
Below is the Email Settings page shown at defaults.
Do not enclose email or email-to-SMS addresses in angle brackets (<>).
1. Select the Email Enabled check box.
2. In Mail Server:
Room Alert ‘E’ models and the Room Alert 3 Wi-Fi do not support SSL or TLS mail servers. If your mail server requires SSL or TLS, you may instead use your Room Alert Account for email alerts, which does not require any mail server setup at all.
3. In Return Address, enter the email address you want the alerts to come from. This email address must already exist on your mail server.
4. In Email Recipients, enter 1 or more email addresses to receive alerts.
5. In Display URL Enabled / Display URL:
If the return address email account requires a username and password, enter it here. Otherwise, you may leave all of these fields blank.
1. Select the Enable Authentication check box.
2. In Username, enter the user name for the return address email address.
3. In Password, enter the password for the return address email address.
Select Save Settings at the top or bottom of the screen. Your Room Alert Monitor will reboot with your new SNMP email settings.
After your unit has rebooted, select the Send Test Email button to send a test email to all of the recipients in the Email Recipients field.
If you don’t receive the test message, please refer to this FAQ for assistance: What to Do if Email from Your Room Alert Monitor Is Not Working
We'd love to talk with you about your monitoring needs. Contact one of our Product Specialists for a free consultation.


You may find Windows Command Prompt at the following path:
To run Windows Command Prompt as an administrator:

If you are using this client, you should configure the general SNMPv3 Credentials, but leave the Read / Write SNMPv3 Credentials section blank.
| Current S models | Current E models |
|---|---|
| Room Alert 32S | Room Alert 32E |
| Room Alert 12S | Room Alert 12E |
| Room Alert 3S | Room Alert 4E |
| Room Alert 3E | |
| S models | E & W models |
|---|---|
| Room Alert 32S | Room Alert 32E |
| Room Alert 12S | Room Alert 12E |
| Room Alert 3S | Room Alert 4E |
| Room Alert 3E | |
| Room Alert 3W |
| Model |
|---|
| Room Alert MAX |
| Room Alert 32S |
| Room Alert 12S |
| Room Alert 3S |
| Room Alert 32E/W |
| Room Alert 12E |
| Room Alert 4E |
| Room Alert 3E |
| Room Alert 3 Wi-Fi |
