Support

Knowledge Base  /  Frequently Asked Questions  /  Room Alert Manager  /  Device-ManageR-to-Room-Alert-Manager Import Tool

How To Use The Device-ManageR-to-Room-Alert-Manager Import Tool (Legacy)

This legacy tool was removed from Room Alert Manager in v2.3.1.

What to expectHow to run the Import ToolWhere to look in Room Alert Manager for imported items

Please read the information below so that you know what to expect from the Import Tool.

The Device ManageR source folder

You can import from one of two different Device ManageR source folders:

  1. Your Device ManageR v6.3.6 program installation folder.
    • This is the easiest option. You can use this option if your Device ManageR writes to the default  embedded H2-type database that comes with the program.
    • By default, Device ManageR’s installation folder is:
      • C:\Program Files (x86)\AVTECH Device ManageR (on 64-bit Windows computers)
      • C:\Program Files\AVTECH Device ManageR (on 32-bit Windows computers)
  2. A custom folder that you put together than has just the required files from Device ManageR v6.3.6.
    • You must use this option if you configured your Device ManageR to write to an external database (MySQL, SQL Server or Postgres).
    • Please note that Room Alert Manager currently only supports its own embedded database. It does not support external databases.

For instructions for the custom folder, please see our FAQ, How to Make a Custom Device ManageR Folder for the Room Alert Manager Import Tool.

The software you need

You need the following software for the import:

  1. Your existing Device ManageR installation, which must be on v6.3.6 before you begin.
  2. The latest version of the Device-ManageR-to-Room-Alert-Manager Import Tool.
  3. The latest version of Room Alert Manager.
  • Device ManageR v6.3.6
  • Device-ManageR-to-Room-Alert-ManageR Import Tool
    • Available in Room Alert Manager’s Installation Directory.
  • Room Alert Manager
    • Available on the Downloads page.
    • Requires a Professional (or higher) level account.

If your Device ManageR is on a lower version, update to v6.3.6 before you begin. For instructions, please see our FAQ, How To Install Device ManageR.

Where that software should be installed
  • The Import Tool must be installed on the same computer as Device ManageR.
  • Room Alert Manager may be installed on the same computer or a different computer on your network.
    • Room Alert Manager must be installed and running when you initiate an import.

You must have Windows administrator privileges on the computers that host the Import Tool and Room Alert Manager.

What the Import Tool imports

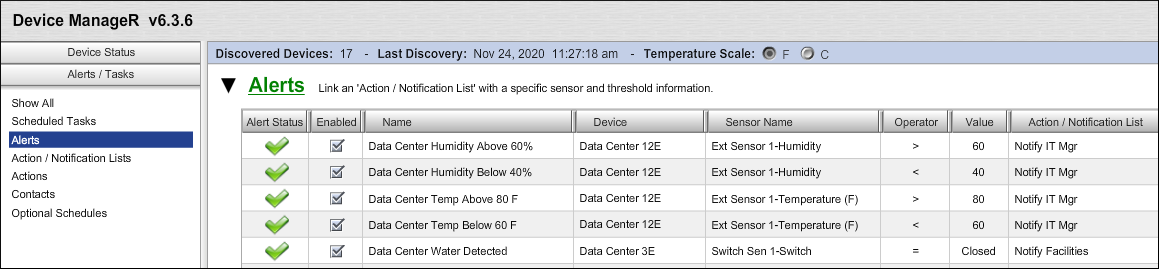
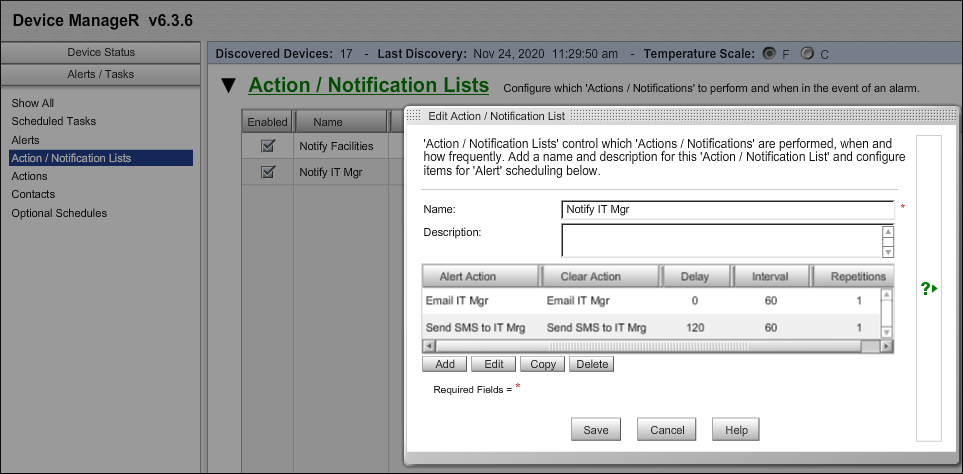
The Import Tool imports configurations from Device ManageR v6.3.6 that are compatible with Room Alert Manager. It does not import your historical sensor and alert data.

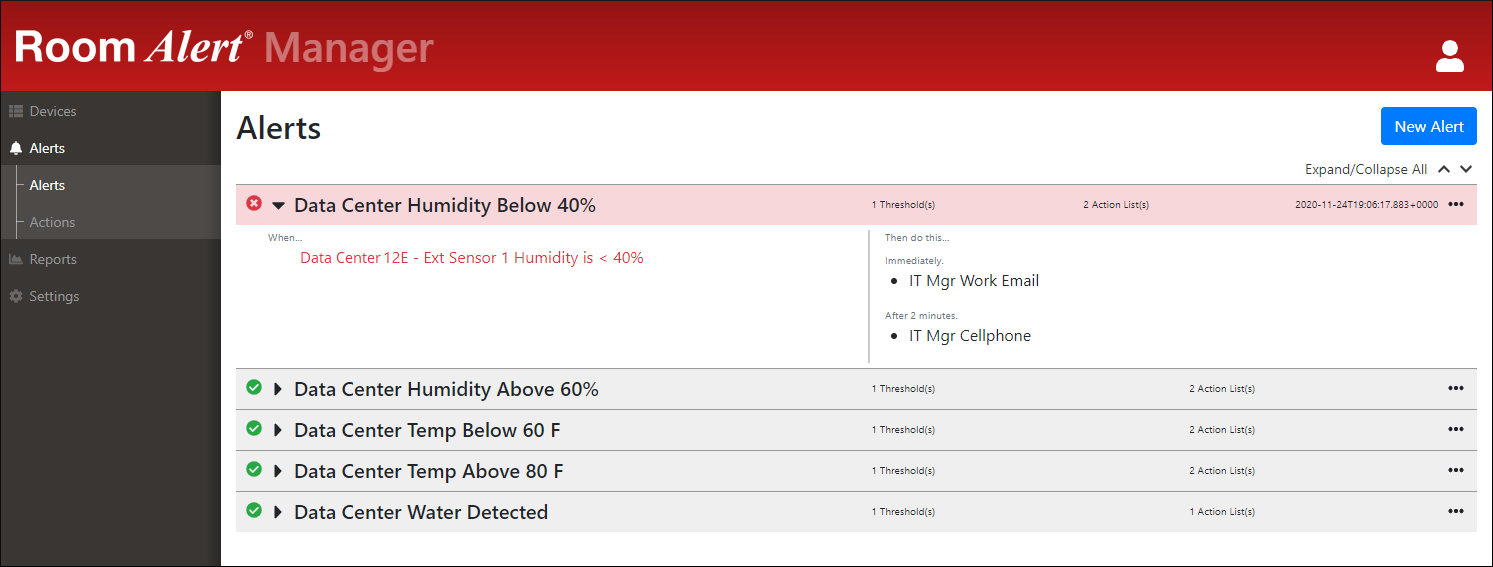
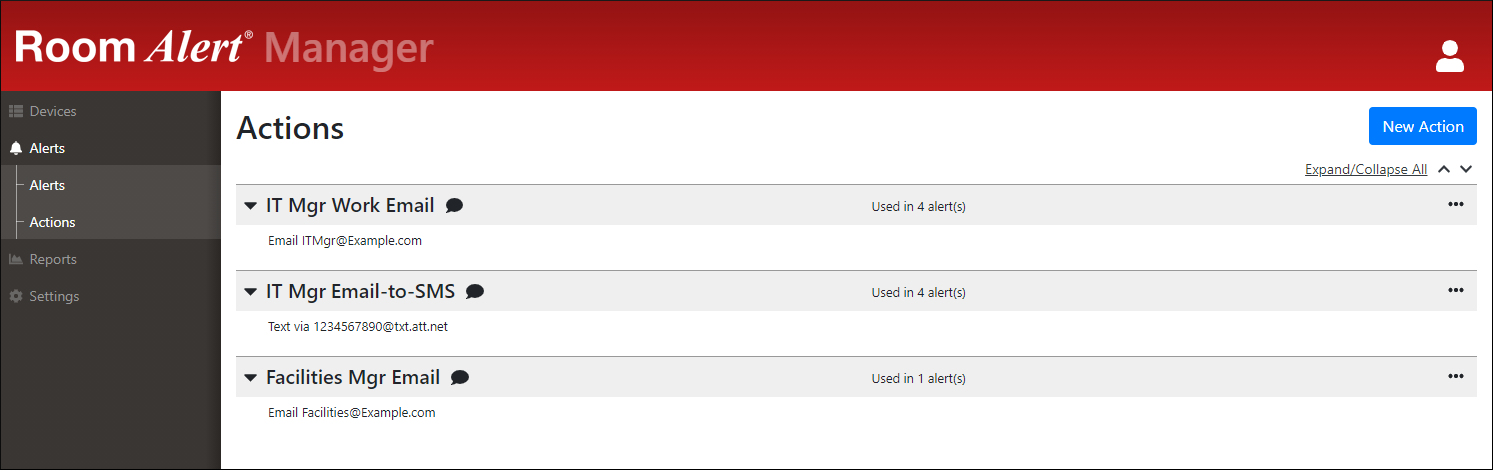
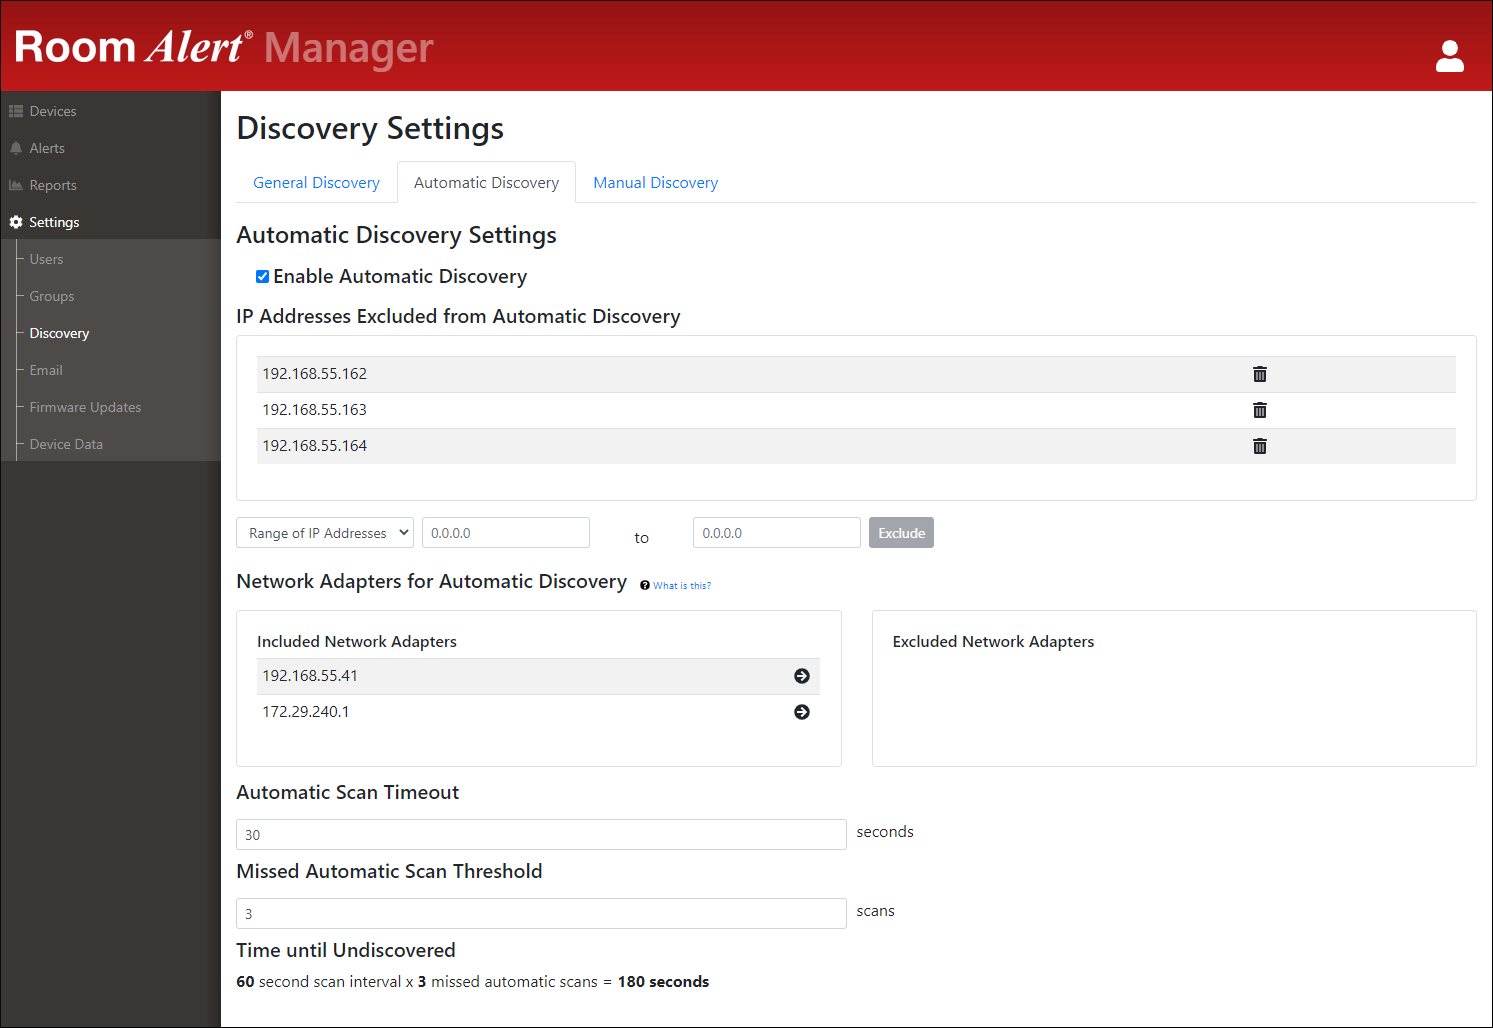
The following items are imported:

  1. From your Alerts/Tasks tab:
    • From Contacts: email addresses (including email-to-SMS addresses).
      • Those email addresses become “Notify” Actions in Room Alert Manager.
      • Those “Notify” Actions have the name you gave the Contact record in Device ManageR.
    • From Alerts: alerts that meet the following criteria.
      • The alert is on a sensor supported by Room Alert Manager.
      • That sensor is on a device that is supported by Room Alert Manager.
    • From Action/Notification Lists that are attached to the imported alerts:
      • The “Send Email to Configured Contact” action items.
      • Any “Perform the Action after X seconds” delays on those actions.
  2. From your Settings tab:
    • These Discovery settings:
      • Discovery Scan Interval
      • Auto Discovery Timeout
      • Manual Discovery Timeout
      • Data Refresh Interval
      • Disable Auto Discovery
      • Missed Scans Before Disabling Devices
    • Your SMTP Email settings for Primary and Secondary Mail Servers (except the Test Email Recipient).
    • Your Blocked devices
  3. From the Device Status –> Advanced Discovery Options –> Manually Add Devices via IP Address feature: your manually-discovered IP addresses.
  4. From your Device ManageR database: the following information so that Room Alert Manager knows what device and sensor your imported Alerts go with:
    • The MAC address and device model that an imported alert points to
    • The sensor type, channel, and port that the imported alert points to (Example: Temperature & Humidity Sensor, Heat Index, Ext Sensor 2)

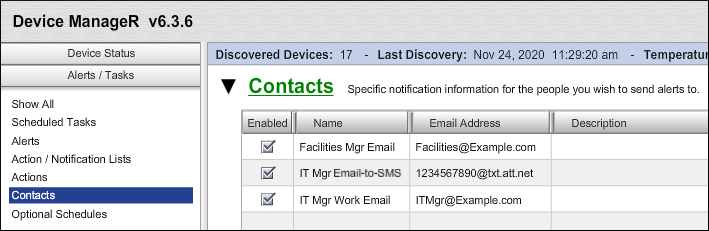
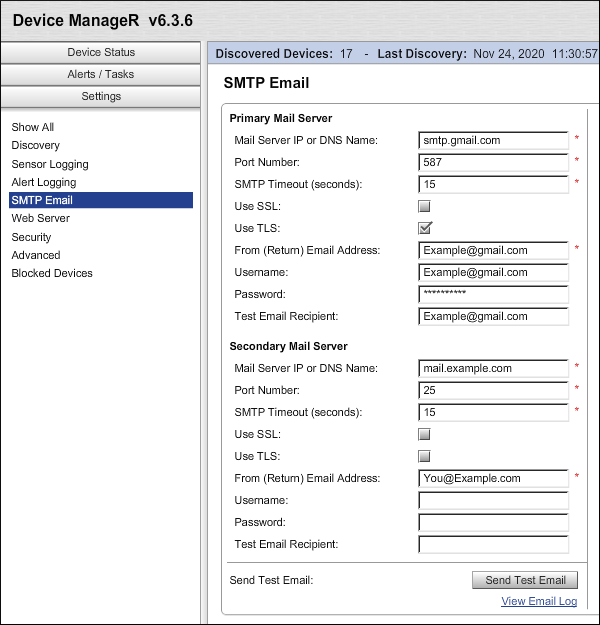
Please note that the devices and sensors themselves are not imported into Room Alert Manager—just information about them to complete an Alert.

No other items are imported by the Import Tool.

You must have Windows administrator privileges to install and run the Import Tool.

Before you begin…

Step 1: Run the Import Tool
  1. Locate the Import Tool within Room Alert Manager’s installation directory (C:\Program Files\AVTECH Room Alert Manager\adm2ram by default).
  2. Click (or double-click) on the AVTECH-ADM2RAM-import-tool-vX.X.X.exe file.
  3. If the User Account Control dialog box appears, select Yes to continue.
  4. The Windows Command Prompt opens to the following screen:
Step 2: Answer the prompts.
  1. Answer the 6 prompts that appear. The prompts ask you these questions:
    • What folder are you importing from?
    • What is the path to that folder?
    • Is Room Alert Manager on this computer? (If not, what is the IP address or computer name of Room Alert Manager’s host computer?)
    • What HTTP port is Room Alert Manager using?
    • Enter the username of any Admin-level user in Room Alert Manager.
    • Enter password for that user.

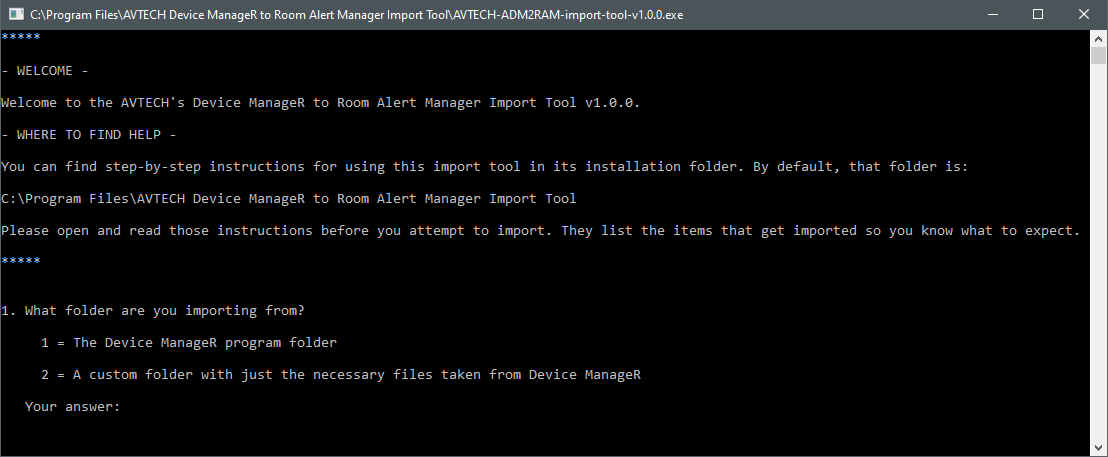
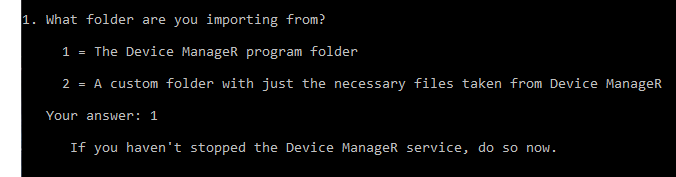
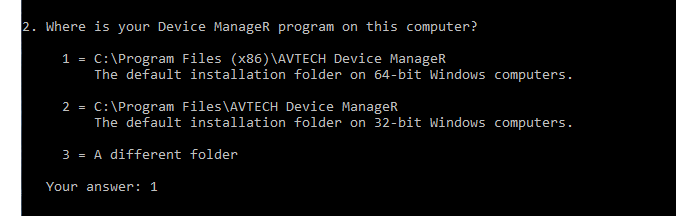
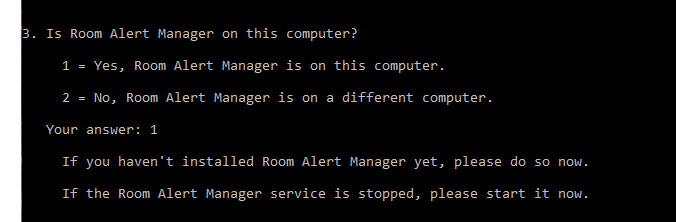
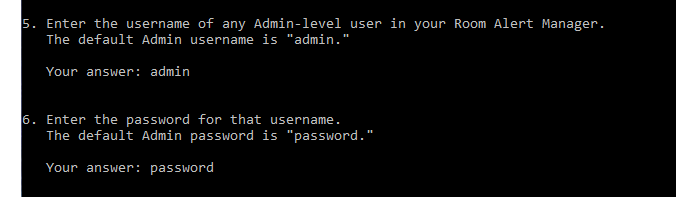
As much as possible, answer choices are spelled out for you on-screen so that you simply pick the correct one. Some things you will have to type in yourself. For example, if Room Alert Manager is installed on a different computer than the Import Tool, you will have to type out the IP address or computer name of that system.

  1. After you enter the last answer, a summary of your choices will appear. Read it to make sure your choices are correct.
  2. If you are satisfied with your choices, enter “y” to run the import. (If not, enter “n.” The command prompt will close. You can restart by opening the program through the Start menu.)
  3. Once you enter “y,” the import begins and the results print onscreen. You’ll see the imported items and a confirmation message at the end.
  4. Press the Enter key to close the screen. You are done with the Import Tool.

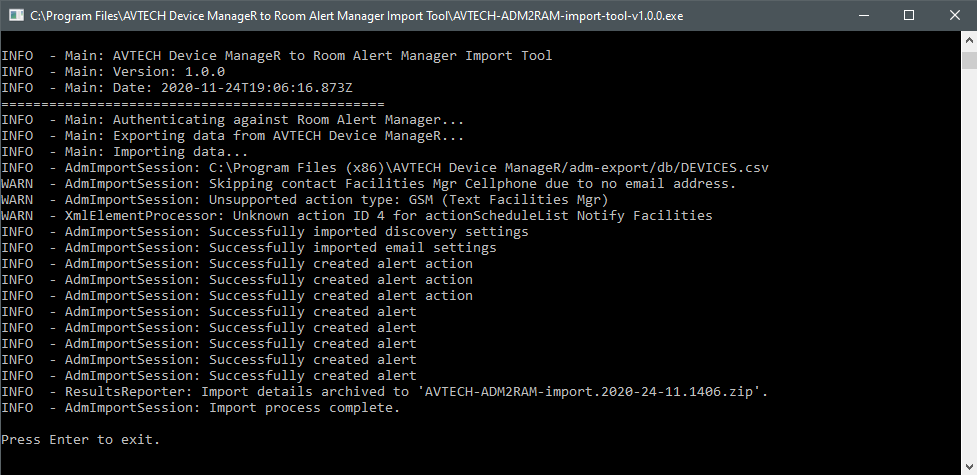
If you run the Import Tool again, the same Alerts and Actions will be added a second time (and a third time, a fourth time, etc). The duplicate Alerts and Actions will need to be deleted from Room Alert Manager.

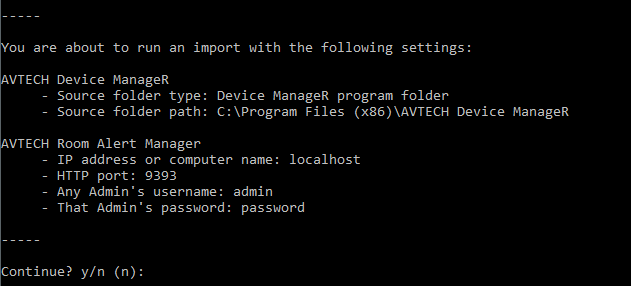
Open Room Alert Manager in your browser. By default, you can open it a localhost:9393 or IPAddress:9393 (example 192.168.2.123:9393) in your browser’s address bar.

Navigate to:

  • Alerts –> Alerts to view your imported Alerts and the associated imported Actions.
  • Alerts –> Actions to view your imported email Contacts. (Remember that email Contacts become Actions in Room Alert Manager.)
  • Settings –> Discovery to view your imported Discovery settings, Blocked devices and manually-discovered IP addresses.
  • Settings –> Email to view your imported SMTP Email settings.
Facebooktwitterredditpinterestlinkedinmail
Room Alert is Made in the USA, ships worldwide from our locations in the US and EU, and has been protecting facilities since 1988.

You may find Windows Command Prompt at the following path:

  • Windows 7 & 8
    Start--> All Programs--> Accessories--> Command Prompt
  • Windows 10
    Start--> All Apps--> Windows System--> Command Prompt

To run Windows Command Prompt as an administrator:

  • Windows 7 & 8
    Right-click on Command Prompt and select Run as administrator.
  • Windows 10
    Right-click on Command Prompt, select More and then select Run as administrator.

Example Polling Method Properties saved in Orion SolarWinds:

If you are using this client, you should configure the general SNMPv3 Credentials, but leave the Read / Write SNMPv3 Credentials section blank.

Room Alert Link- Supported Firmware Updates


Current S modelsCurrent E models
Room Alert 32SRoom Alert 32E
Room Alert 12SRoom Alert 12E
Room Alert 4E
Room Alert 3E

Room Alert Manager - Compatible Devices

The latest version of Room Alert Manager supports only the devices below.

It does not support any legacy Room Alert or TemPageR models.

Current S modelsCurrent E models
Room Alert 32SRoom Alert 32E
Room Alert 12SRoom Alert 12E
Room Alert 3SRoom Alert 4E
Room Alert 3E
Room Alert 3W