Knowledge Base
/
Frequently Asked Questions
/
Room Alert Manager
How To Configure Server Command Actions In Room Alert Manager
Room Alert Manager can automatically send a server command in response to an alert. This feature is advantageous for powering down a system or group of systems when environment conditions—such as high temperatures, power loss, flooding, etc.—could potentially lead to catastrophic system damage.
Before you begin:
Room Alert Manager connects to servers via SSH keys. In order for Room Alert Manager to perform server commands, you must generate your own SSH key pair(s) and store the keys securely on your systems. For more information, please see How To Configure Room Alert Manager To Use An SSH Key.
Step 1: Configure the target server in Room Alert Manager
- Open Room Alert Manager in your web browser.
- In order to configure server actions in Room Alert Manager, you must log in as an admin-level or manager-level user.
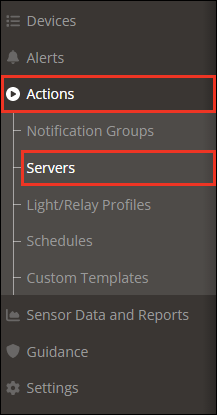
- Select Actions –> Servers in the navigation bar to the left to open the Servers page.
- Then select the New Server button.

- The Server Form will open.
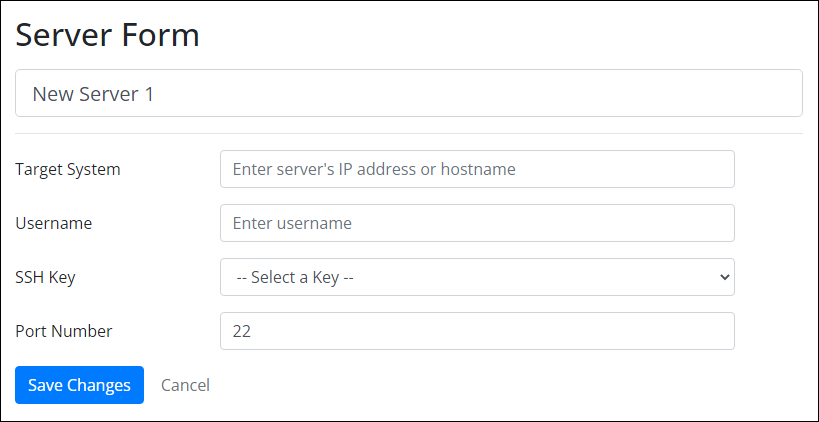
- First, give your server a unique name.
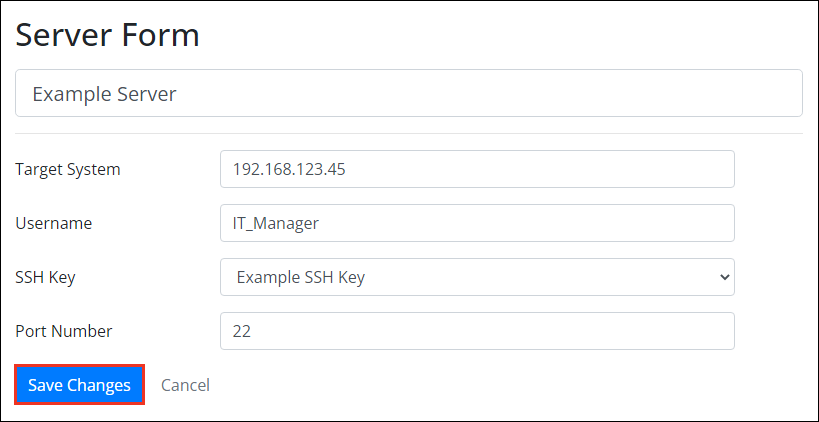
- The default name is “New Server X” but we’re renaming ours “Example Server.”
- In Target System, enter the server’s IP address or hostname.
- In Username, enter the username of a user on the server that can access the system with the private key.
- In the SSH Key drop-down menu, select the saved SSH Key configuration that this server uses for authentication.
- In Port Number, you may leave the default, 22, or enter a custom port.
- Then select Save Changes.
- The server will now appear in the Servers List, as shown below.

- The new server appears in red because it has not yet been tested.
- Expanding the server details in the list shows “Last connection attempt: never.”
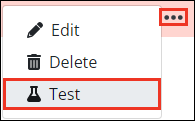
- To test the server connection, either click the “test connection” link in the expanded server details, or select Test from the server’s context menu.
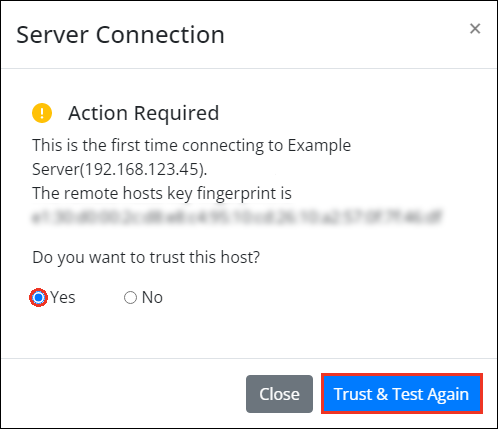
- You may see a message stating that this is the first time connecting to the server. If so, select Yes and Trust & Test Again.
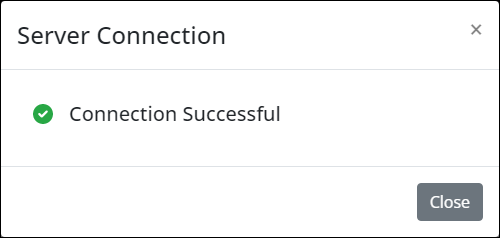
- If the test is successful, you’ll see a confirmation message, and the server will no longer be highlighted in red within the list.
If the test fails, please see this FAQ for troubleshooting information: How To Troubleshoot Server Command Actions In Room Alert Manager. - Once the server connection has been successfully tested, you can start adding server actions to alerts—see the next section for instructions.
If you edit the server configuration in the future, you should re-test the connection.
Step 2: Configure a Server Command Action
- Begin configuring your alert in Room Alert Manager. This FAQ shows you how: How To Create Alerts In Room Alert Manager.
- Stop when you reach “Step 3: Add actions to your alert.”
- In the Then… section of your new alert, select Server Command to add a Server Command action.

- In the Server Command Action form, first select a command from the drop-down menu.

- You may choose to shutdown or reboot a Windows, Linux, or Mac system. The command to be sent to the server is displayed beside the drop-down menu.

- Then select one or more servers to send the command to.

- (Optional) You may configure the action to repeat and/or associate the action with a Quiet Time schedule.
- In most cases, server shutdown and reboot command actions should not be configured to repeat.
- When you’re done configuring your alert, select Save Changes.


