
Knowledge Base / Frequently Asked Questions / Room Alert Monitors (PRO, MAX, and Legacy)
Working with a Room Alert 32S, 12S or 3S? Please see this FAQ: How To Maximize Your Room Alert ‘S’ Model’s Security.
AVTECH prioritizes security when designing our products, which you can read about here: Room Alert and IoT Device Security. Along with the security measures built into our products, there are additional settings that customers can apply in order to maximize security, such as:
– Configuring a password to access the web interface Settings page, and
– Disabling any of the following features that you do not wish to use:
– Room Alert web interface
– SNMP trap sending
– TFTP firmware updates
– Trace output
– Telnet menu *
– Discovery over port 30718 *
* Not available on some legacy models.
We recommend password-protecting your Room Alert Monitor settings. Please see this Frequently Asked Question for instructions: How To Set (Or Reset) A Password On A Room Alert Monitor.
You can disable Room Alert Monitor features that you aren’t using through the unit’s Telnet Menu. Please follow the instructions below to do so.
You must have Telnet enabled on your Windows system in order to complete the steps below. Telnet is disabled by default in Windows versions Vista and above. Please see our FAQ How To Enable Telnet In Windows (Versions Vista And Above) for help.
1. Open Windows Command Prompt, which you may find at the following path: Start–> All Programs–> Accessories–> Command Prompt.
2. At the prompt enter the following command, as shown in the example below:
telnet <IP address of the unit> 9999

3. If you are prompted for your Room Alert Monitor password, enter it and then press the Enter key on your keyboard. Otherwise, simply press Enter.

You must press Enter within a few seconds or you’ll get a ‘Connection to host lost’ message. If you see that message, press Enter to get the prompt back and re-enter the telnet command from Step 2.
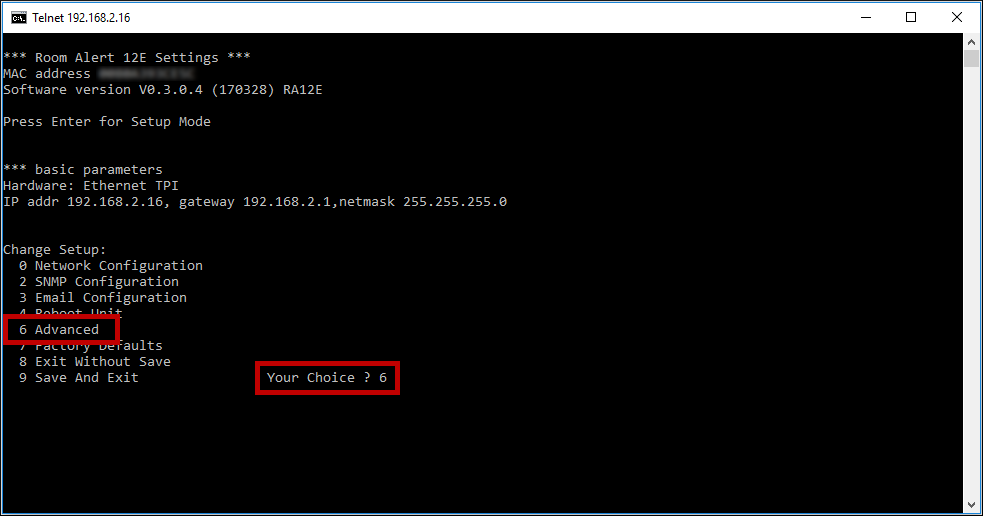
4. The Telnet menu will appear as shown below.
5. At the Your choice? prompt, enter 6, which corresponds to ‘Advanced Settings.’
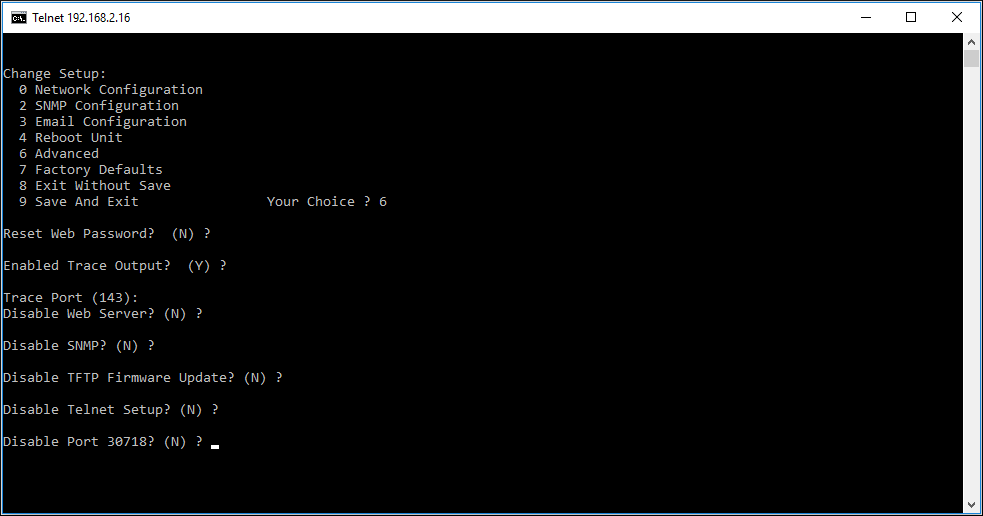
6. Depending on your model type and firmware version, the following prompts are included in advanced settings:
– Enabled Trace Output?
Enter N if you wish to disable tracing on the unit.
– Disable Web Server?
Enter Y if you wish to disable the unit’s web interface.
– Disable SNMP?
Enter Y if you wish to disable the unit from sending SNMP traps and responding to SNMP Queries.
– Disable TFTP Firmware Update?
Enter Y if you wish to disable the option to perform firmware updated on the unit using TFTP commands. Note that this will need to be enabled again to perform future firmware updates.
– Disable Telnet Setup?
Enter Y if you wish to disable your Telnet menu. Note that the only way to reverse this setting is to reset the unit to defaults.
– Disable Port 30718?
Enter Y if you wish to disable discovery of the Room Alert on your network. Note that we recommend first setting the Room Alert Monitor to a static IP address, so that you can easily find it. If the device is pushing sensor data to RoomAlert.com, you can find its IP address listed in your account as well.
7. Disable any features you do not wish to use. You can also simply press Enter to bypass any prompts that you do not wish to change.
8. After you have responded to all of the advanced settings prompts, the Telnet menu will reappear.
9. At the Your choice? prompt, enter 9, which corresponds to ‘save and exit.’
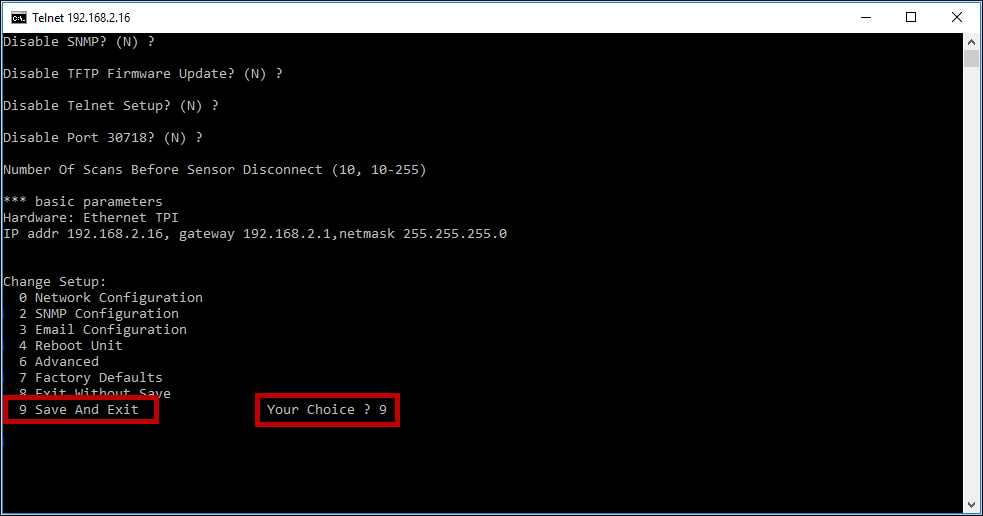
10. Then enter Y to proceed.

11. Your Room Alert Monitor will reboot with its new settings.
We'd love to talk with you about your monitoring needs. Contact one of our Product Specialists for a free consultation.


You may find Windows Command Prompt at the following path:
To run Windows Command Prompt as an administrator:

If you are using this client, you should configure the general SNMPv3 Credentials, but leave the Read / Write SNMPv3 Credentials section blank.
| Current S models | Current E models |
|---|---|
| Room Alert 32S | Room Alert 32E |
| Room Alert 12S | Room Alert 12E |
| Room Alert 3S | Room Alert 4E |
| Room Alert 3E | |
| S models | E & W models |
|---|---|
| Room Alert 32S | Room Alert 32E |
| Room Alert 12S | Room Alert 12E |
| Room Alert 3S | Room Alert 4E |
| Room Alert 3E | |
| Room Alert 3W |
| Model |
|---|
| Room Alert MAX |
| Room Alert 32S |
| Room Alert 12S |
| Room Alert 3S |
| Room Alert 32E/W |
| Room Alert 12E |
| Room Alert 4E |
| Room Alert 3E |
| Room Alert 3 Wi-Fi |
