
Knowledge Base / Frequently Asked Questions / Room Alert Monitors (PRO, MAX, and Legacy)
If you do not have DHCP enabled on your network, you must connect your Room Alert directly to a computer to discover it initially. From there, you may set a static IP on the unit so that it may be seen by your regular network.
If you connect your Room Alert MAX (out of the box) to a non-DHCP network, the unit will assign itself the IP address 169.254.100.44.
There is no default IP address for Room Alert “S” models. If you connect your Room Alert “S” model (out of the box) to a non-DHCP network, the unit will assign itself a random 169.254.xxx.xxx address and will likely not be discoverable.
Select the proper tab below to view instructions for the utility you installed in Step 1.
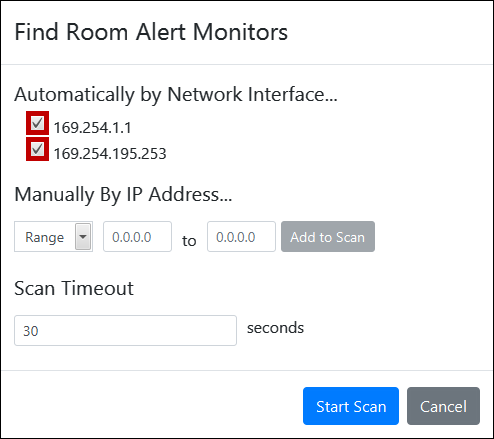
To search for your Room Alert, follow these steps:
To search for your Room Alert, follow these steps:

We'd love to talk with you about your monitoring needs. Contact one of our Product Specialists for a free consultation.


You may find Windows Command Prompt at the following path:
To run Windows Command Prompt as an administrator:

If you are using this client, you should configure the general SNMPv3 Credentials, but leave the Read / Write SNMPv3 Credentials section blank.
| Current S models | Current E models |
|---|---|
| Room Alert 32S | Room Alert 32E |
| Room Alert 12S | Room Alert 12E |
| Room Alert 3S | Room Alert 4E |
| Room Alert 3E | |
| S models | E & W models |
|---|---|
| Room Alert 32S | Room Alert 32E |
| Room Alert 12S | Room Alert 12E |
| Room Alert 3S | Room Alert 4E |
| Room Alert 3E | |
| Room Alert 3W |
| Model |
|---|
| Room Alert MAX |
| Room Alert 32S |
| Room Alert 12S |
| Room Alert 3S |
| Room Alert 32E/W |
| Room Alert 12E |
| Room Alert 4E |
| Room Alert 3E |
| Room Alert 3 Wi-Fi |
| Model |
|---|
| Room Alert MAX Base Station |
| Room Alert 32S |
| Room Alert 12S |
| Room Alert 3S |
| Room Alert 32E/W |
| Room Alert 12E |
| Room Alert 4E |
| Room Alert 3E |
| Late Legacy Models | Early Legacy Models |
|---|---|
| Room Alert 32E | Room Alert 32W |
| Room Alert 12E | Room Alert 26W |
| Room Alert 4E | Room Alert 24E |
| Room Alert 3E | Room Alert 11E |
| Room Alert 7E | |
| TemPageR 4E | |
| TemPageR 3E |
