Knowledge Base
/
Frequently Asked Questions
/
Room Alert Manager
How To Configure Pings In Room Alert Manager
Room Alert Manager can ping a target IP address or domain every 15 seconds and report its state as Up or Down.
Room Alert Manager treats pings similarly to Room Alert Monitors — you may sort pings into device groups, configure alerts on them and graph them.
Pings are made up of two components:
1. Ping Device: serves as the container for one or more ping sensors
- Ping devices appear in an Inventory List, as well as in device drop-down menus when editing alerts and data groups.
- In the example shown here, ours is called “Example Ping Device.”
2. Ping Sensor(s): monitor an individual IP address or domain
- Ping sensors appear in sensor drop-down menus when editing alerts and data groups.
- In the example shown here, our ping device contains 2 ping sensors: “Example ICMP Ping” and “Example HTTP Ping.”
To configure a ping in Room Alert Manager, please follow these steps:
- Open Room Alert Manager in your web browser.
- In order to create pings in Room Alert Manager, you must log in as an admin-level user.
- Select Devices –> Ping Devices in the navigation bar to the left to open the Ping Devices page.
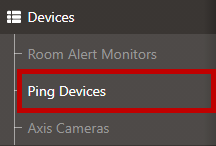
- Then select the Create a new Ping device button.

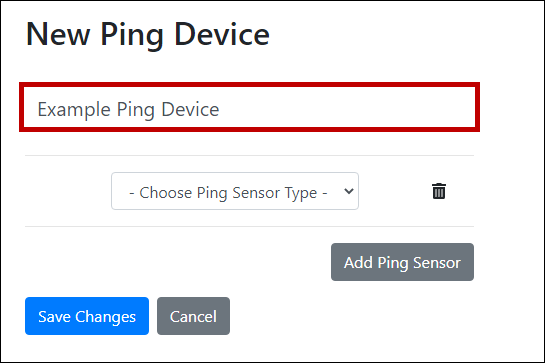
- The New Ping Device form will appear. Here, you may configure HTTP and ICMP ping sensors.
- First, give your ping device a unique name.
- The default name is “New Ping Device X” but we’ve renamed ours “Example Ping Device.”
- In the Choose Ping Sensor Type drop down menu, select either HTTP Ping or ICMP Ping.
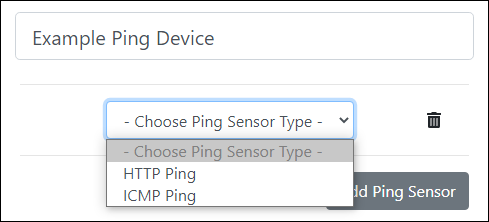
- We’re choosing HTTP Ping for our first example.
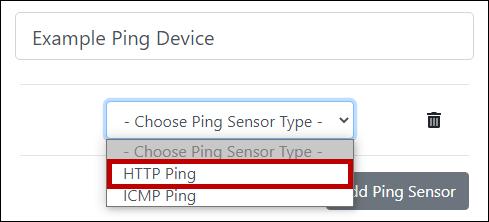
- Fill out the fields that appear below:
- In Name, enter a unique name for your ping sensor. We called ours “Example HTTP Ping.”
- In Target URL, select with HTTP or HTTPS from the drop-down menu. Then enter the address you wish to ping.
- In Target Port, you may leave the default value, which is 443 for HTTPS or 80 for HTTP. Otherwise, you may select Use Custom and enter a custom port.
- In Timeout, you may leave the default, 2000 milliseconds (2 seconds), or enter a different value up to 5 seconds.
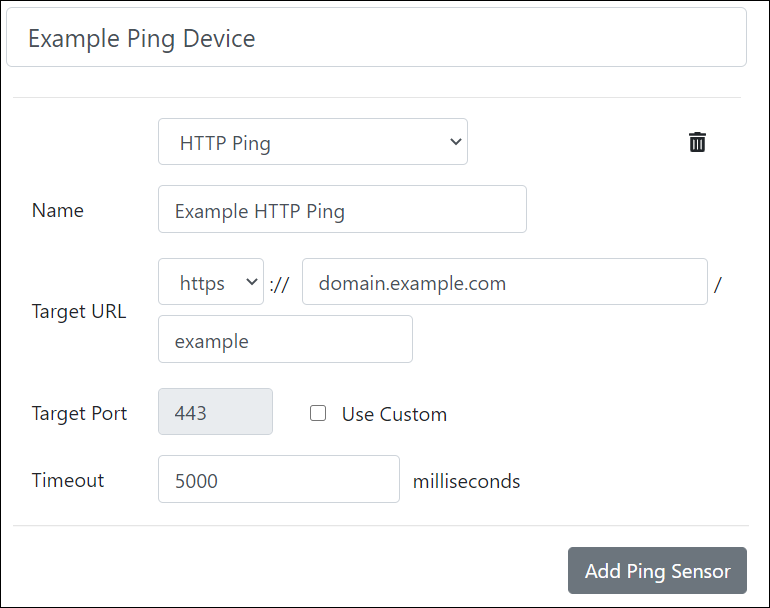
- You may add as many ping sensors to a single ping device as you’d like by selecting the Add Ping Sensor button.

- We’re adding a second ping sensor to ours. This time, we’re selecting ICMP Ping.

- Fill out the fields that appear below:
- In Name, enter a unique name for your ping sensor. We called ours “Example ICMP Ping.”
- In Target Host, enter the address you wish to ping.
- In Timeout, you may leave the default, 2000 milliseconds (2 seconds), or enter a different value up to 5 seconds.
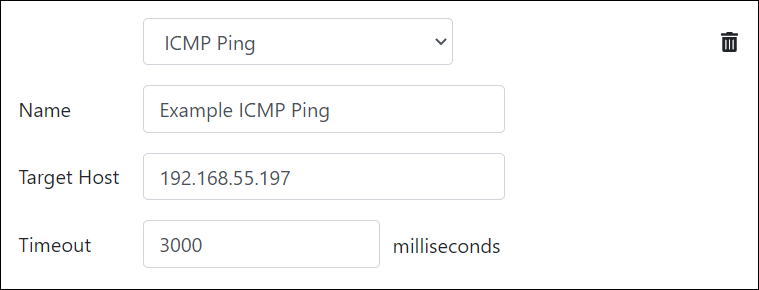
- When you’re done adding ping sensors to your ping device, select Save Changes.

After you save your ping device, it will take approximately 15 seconds for its data to fully populate throughout Room Alert Manager.
Until then, your ping sensors will not appear in drop-down menus, and you’ll see a “status unavailable” message in your ping’s details page.


